Want to know how your maps look when others open it? What other options do your viewers have?
Quick Tip
Google Docs: Emojis
Last week, my students were writing an essay in their Google Docs. In the middle of writing, one student asked, “Hey, Ms. N., did you know you can insert emojis in docs?”
I was surprised and answered, “Wait, what? No? Really? Cool. Show me how.” So I went over to her table and she showed me. Pretty cool!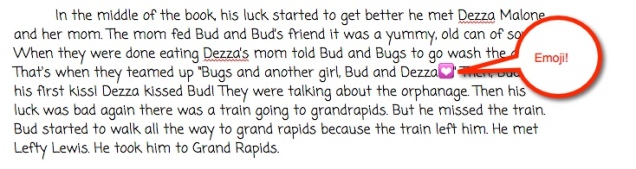
So how’d she do it?
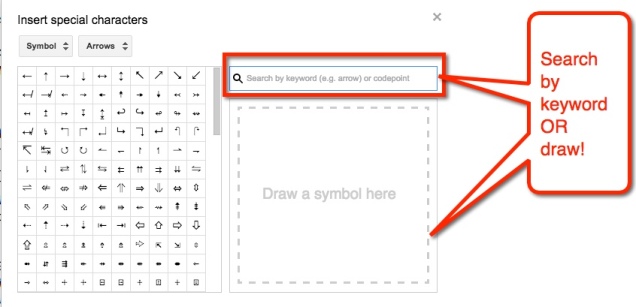
Start by going to ‘Insert’ in the menu options

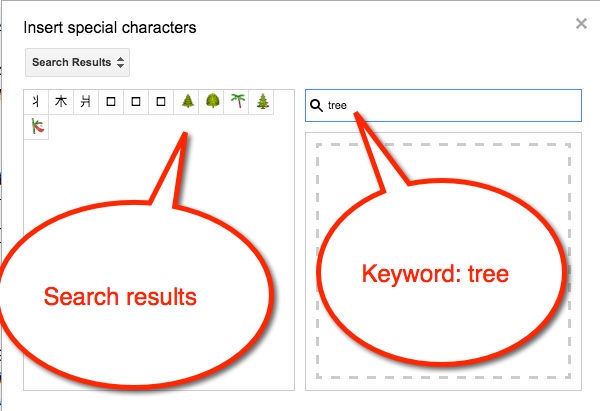
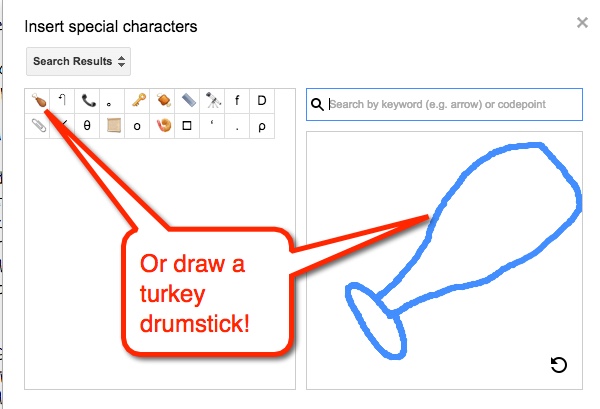
Choose the desired emoji and viola! You have an emoji in your doc. Now, what if we had students summarizing stories with just emojis?!
Thank you to my student, Johanna, for spreading her knowledge!
Which One Doesn’t Belong
Last year I was introduced to a great website called Which One Doesn’t Belong by my friend, Nancy Minicozzi. The site is full of visuals in which students must decide which of the 4 images doesn’t belong.
Looking at the following, which would you say doesn’t belong?

Based on your perception you may have said the heart because it is the only one that is NOT a polygon. Or perhaps you thought the star for the lack of the red outline. Possibly you were drawn to the green arrow as it is comprised of two different shapes. Or maybe it was the last shape because it lacked a color on the inside. No matter what you thought, you were right.
This is a fantastic, low-risk activity for students to participate in. I have done it a few different ways. I have had students study the image and then move to different parts of the room. While gathered there, they talk about why they chose the image they did. Other times I have used tools like Padlet for them to record their thoughts. No matter what method I use, they enjoy the activity.
This year I have 1 non-English speaker. At first, he was reluctant to participate, but now he regularly raises his hand to explain why he chose the image he did. I also have students moving from table to table because they can see how the different images don’t belong.
In addition to the low-risk appeal, I am able to teach my students how to have conversations. We begin sentences with, “I agree with…. because…”, or “I disagree with… because…”, or even better, “In addition to what … said…” Quality language, thought process, and communication skills that are being utilized daily.
Student ‘Ransomes’
This year I have been giving out a few ‘Ransomes’ each week. I know what you’re thinking, no I did not hijack personal objects from students and offer to return them in exchange for payment of Kit Kat minis (my totes faves!) No, Ransomes are little notes I leave for students like this one:
I do usually put their name on them as well.
I didn’t think much of the habit. I just thought it was cute and a nice way to send a positive message to my students. It wasn’t until Parent-Teacher Conferences last week that I realized how much they mean to the students. Sometimes it’s easy for us to overlook how much a simple gesture means to a child. One of my parents told me that the Ransome I had given her son had made his day. He was so proud of that note, he put it in his room at home. It was something that made his day and the mom’s day, too.
What I Do
Go to Ransomizer and type your message in the box provided. When you’re ready, select the ‘Ransomize’ button. You can customize the font, colors, etc. I then take a screenshot of the Ransome Note and place that in a Google Doc to print. I print 5 per week.
Give it a try. Your kids will love it and it’s a great way to connect with your students.
Makeshift Keyboards
Recently I received a new student in my 5th-grade class. Great kid from India. He has some English, enough to tell me he wants a Punjabi Keyboard. So, we created a Punjabi keyboard for him. First, we selected the correct keyboard on his Chromebook. Then, he pointed out that the physical keyboard was still in English. So then we looked up a Punjabi Keyboard online and I printed it out. Using Google Translate, we affixed them on the correct keys. We used tape. We were in business! Things were going great. Score 1 for me.

This victory didn’t last long. He then came to me telling me that the paper was bugging his fingers and I needed to tape the tops too. I explained that the keys would then all stick down to the board. So then, I had another brilliant idea: Saran Wrap, poor man’s keyboard cover. Yet another score for me.

Yes! This worked. He was happy. Until…. He wanted it all off. Yup, it wasn’t working for him. He wanted to continue with the English Keyboard…
(Sigh) You win some, you lose some.
Playlists in YouTube
I’m a huge fan of YouTube, but then again who isn’t? One of my favorite features is the ability to create Playlists. These are a collection of videos of your choice. For example, I have a playlist for grammar to help students who are struggling with various grammar issues.
In YouTube, on the left side is my menu. The second section shows my ‘Library’ (aka playlists). creating them is SUPER easy!

When I find a video I like, I add it to (or create a new) playlist. The ‘Add to’ choice appears just below the video.

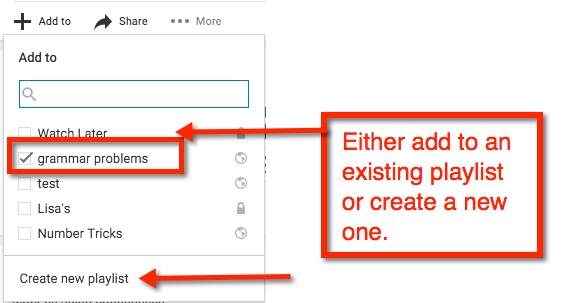
If you are creating a new playlist, you will have the option to have it ‘Public’ (open for anyone to find), ‘Unlisted’ (other can view if they have the link), or ‘Private’ (must be shared directly with others).

After you name your playlist, select ‘Create’. Viola! You now have started your playlist collection

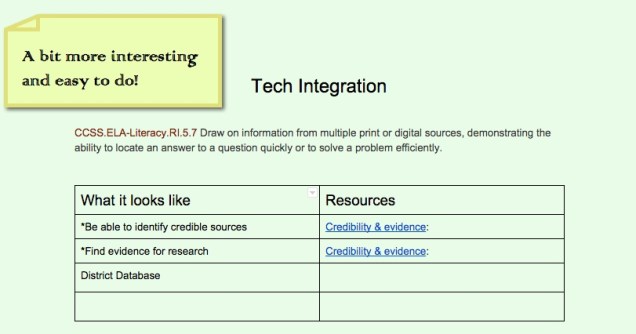
Google Docs: Colored Background
Recently I was giving a presentation using Google Classroom. As a part of the experience, I have participants experience it from the student perspective. One of the assignments had a colored background and caught the attention of a participant. Let’s face it, white backgrounds can be VERY boring!

Changing the background color is super easy. In your Document, navigate to ‘File’ then ‘Page Setup’. A pop-out window appears. Choose ‘Page Color’. This will prompt color choices to appear. You can choose one of those or insert the color code of your choice using ‘Custom’.


Once you find a background color you like, press ‘OK’. To set as background, select ‘OK’ on the Page Setup window in the lower left corner.


You’re all set!
Google Classroom: Create Question
In Google Classroom, I like to ‘Create a Question’ for quick checks or exit tickets. They are easy to create and manage. Students can read each other’s posts, comment, and have quality discussions with ‘Questions’. This is an underused tool by many who use Google Classroom. It truly is a hidden gem in this tool.
In order to create a Question, choose the + located in the bottom right corner of the ‘Stream’ section of your classroom.
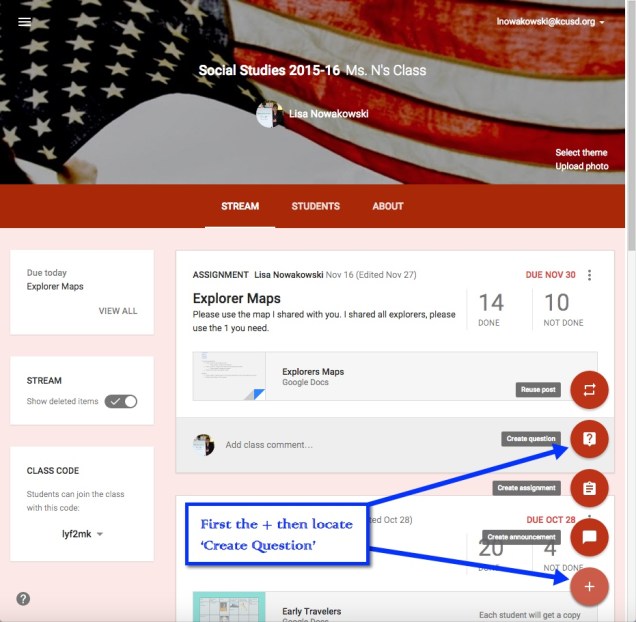
Now I can create my question. I can insert a file, something from my Google Drive, a YouTube video, and/or a link to a website. I can insert as many items as needed. Since I teach 2 classes of Social Studies, I can assign the question to both classes, with files and links, at the same time. I can even set a due date. When I have my preferences set, I choose the blue ‘ASK’ button.

Next a pop-out window appears where I can allow students to view each other’s responses, or not. I can also allow students to edit their own responses. I like to allow students to comment on each other’s. This allows for discussion and opportunity for students to defend their positions. When I’m ready, I click the blue ‘ASK’ button.

My question now appears at the top of the stream.
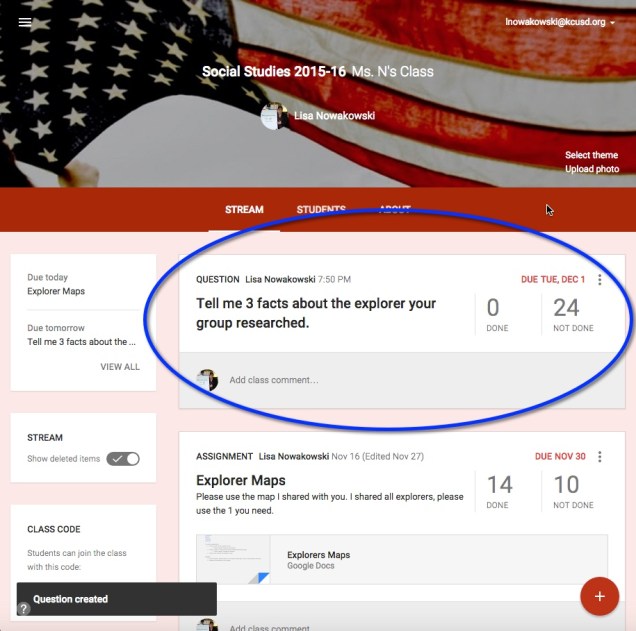
Here’s an example we did early this year. Once the students respond, I can then grade their answers if I choose to. On this particular example, I gave the students some material to review before answering. In order to encourage open dialog, I also asked them to comment on each other’s responses.

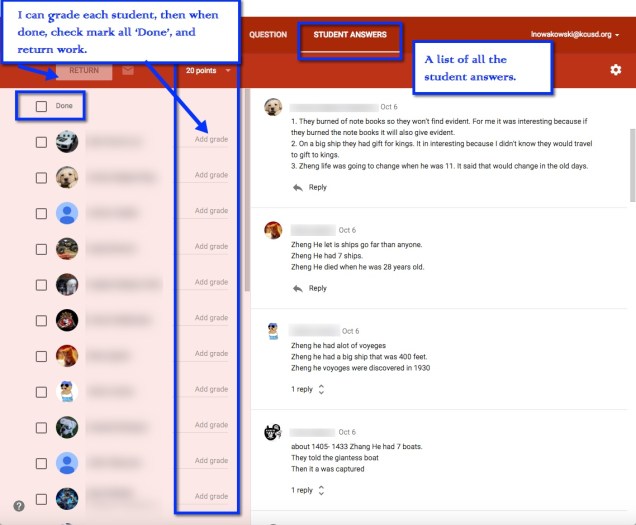
When I’m ready to view, I can click on ‘Done’ in the Question. This takes me to the Student Response page. All of their responses are listed along with the option to grade, comment, and return work.
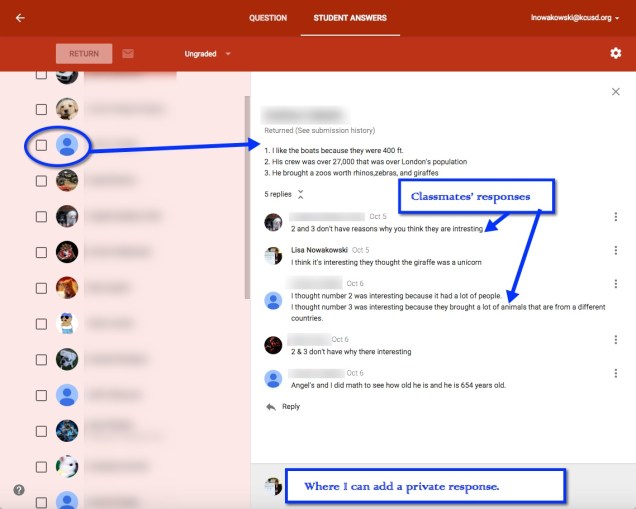
When I click on an individual student, I can see his/her answer and the classmates’ responses.
Search Your Google Drive
I have heard several comment that it is hard for them to find items in their Drive. What many are forgetting is that Drive has powerful search options.
In Google Drive there is a ‘Search Drive’ option at the top. You can type in key words such as the title or known keywords in the item you are looking for. I did a search for ‘puppy’. I know I don’t have anything named that, but I wanted to see which items had ‘puppy’ mentioned. This is what I got:

None of the items are named ‘puppy’. So I wondered what ‘Rabbit’ had to do with puppy. So I went into the Spreadsheet, did a quick search (control + f on PC, or command + f on Mac) and this is what I found. Puppy is mentioned throughout the Spreadsheet.
I can also narrow my search by file type, opens with, or ownership. Choose the small arrow to the right on the Search Drive bar. So if I know the item I am looking for is in a Spreadsheet, I’d choose ‘opens with’ and select spreadsheet.
This should make searching for your items a bit easier. Happy Searching!
