Shifts in Math
 One of the bigger shifts in math, aside from the building blocks in the CCSS Framework, is the ever dreaded ‘Explain your answer’. When this first came out, I wasn’t sure what they meant, the frameworks hadn’t been written yet. I had students explaining that they ‘added the ones then regrouped to get the answer.’ And while they were technically correct, there was a lot missing.
Better Understanding
Now, I have a better understanding of what is needed. The students need to break down each step and explain, using academic language, what their thought process is. I furthered my understanding when I went to a training on this. Honestly, it wasn’t the best training, but it got me thinking. I used some of the techniques to create a better lesson.
The Lesson
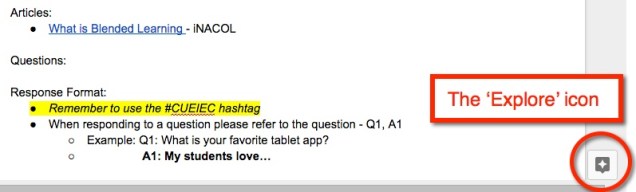
First, I created a template that the students were going to be using. Then, as a group, we walked through each part of the template and filled it in. There was A LOT of guidance this first time. I’m hoping with practice, they will become more independent. Students worked in table groups to solve their table problem. Finally, they were to film their process of solving the problem. Using their ‘scripts’ students explained the process for division. Here’s an example:

 Late last week we had CELDT testing for some students. This meant that I had several students who were NOT being tested. This meant that I really couldn’t start something new as too many students would be out. Okay, so what to do? Well, make Ninja Selfies of course!
 Creative Commons 3 –
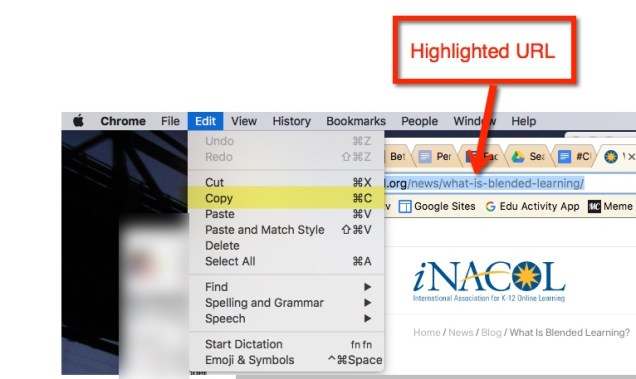
 Or highlight the word or phrase then find the chain (or links)
  in the toolbar.


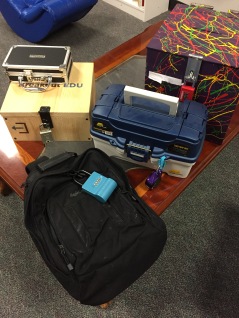 Yes, one of the breakout boxes is a backpack! This was their first exposure to BreakoutEDU. At first, they thought it was going to be easy. A few decided that they would just ‘mess’ with the locks. They soon figured out, it wasn’t so easy!


