Outta Site

Chromebook Scavenger Hunt

Student e-Portfolio Template

Colour Lovers – create patterns from palette


Check out Scott Burt’s Sites info
Website
SLOCUE Connects – 10/4/14 (To view videos, go into Presentation Mode – upper right corner of screen)

Prepared for CUE RockStar 2014 edition:

Link for the collaborative document:

How to embed a NON-YouTube video on Google Sites:

Horizontal Navigation Bar:

Edit Sidebar:

Embed Blogger into your site:

Presentation Background Image

I have previously blogged about how to change the background color of a Google Presentation Slide Template. So this time, let’s take it up a notch. Let’s add a background image to your Slides!

To begin, open Presentation, and choose ‘Simple Light’ as your template. Then from the tool bar, choose ‘Background’.


background 1


background 2

For this example, we will focus on uploading an image from your computer.

Background 3


You can either drag the image or choose to upload from where the image is stored. Let’s look at how to upload the image.

Background 4

When I choose the blue ‘Choose an Image to upload’, a pop-out window appears. Mine automatically shows everything on my desktop (1.). I can also choose a different location on my computer (2.). The image I desire is on the desktop (3.), therefore, I choose it, and scroll down to the ‘open’ button (or I can double click the desired image).

Background 5


I am then given the option to add the image to current slide (1.) or to add image to all existing slides (2.).

background 6


And there you have it, a unique background to your Presentation!

background 7

Table of Contents – Google Docs

This year I had my 5th graders writing their state reports in Google Docs. One of their tasks was to create a Table of Contents. Normally this is painful – mainly for me. While they understand the concept, they often list ALL the pages in a topic. This year I avoided that by using the Table of Contents feature in Google Docs. It was ridiculously easy!

In their state report they changed the text of each heading from ‘Normal Text’ to ‘Heading 1’

toc 1

toc 2

Repeat this process for all sections that need to be added to the Table of Contents. Once you have done this, you can now insert the Table of Contents. Go to the Table of Contents page and place the cursor where you would like the Table of Contents to be submitted. Then insert your Table of Contents.

toc 3

This is what you get. You have hot links to the different sections in a document.

toc 4


Add-Ons – Google Documents

There are many additions that you can add to your Google Drive. For this post, I will specifically talk about Google Documents. An Add-on is simply a tool that makes your life easier. Some examples are: Easy-Bib, Doctopus (great for teacher management – EDU), and a thesaurus.

So how does one get Add-ons? Well, it’s super easy:

Add on 1

add on 2


You can scroll through the options or do a search in the search bar (upper right corner or pop-out menu).

add on 3


Once the desired Add-on is selected, you will need to add it. Simply select the blue ‘free’ (or if there is a cost, the amount will appear) bar located in the upper right corner of the pop-out menu.

add on 4


Another pop-out menu will appear. It will request that you accept their terms.


add on 5


Once you accept, the Add-on will be found under ‘Add-ons’ in the tool bar menu.

add on 6

EasyBib Add-On

I think I’m in LOVE! Yes, I love the EasyBib Bibliography Creator in Google Docs (via Add-Ons). Back in the day when I went to school and wrote reports – only a few short years ago – I had to look up how to cite my sources in a book. Today, all you have to do is type a few bits of information, and the citation is created for you! See, you’re falling in love too, aren’t you?

My 5th graders have no idea how easy they have it. Here’s how it works:

Easy bib1

Easy Bib 2

Easy Bib 3

Easy Bib 4

Easy Bib 5

Easy Bib 6

Easy Bib 7Easy Bib 8

And in case you were wondering, it does save as you work. My 5th graders have been working on their State Reports for a few weeks. As they find resources, they add it to the EasyBib. When they are ready to add it to their Doc, it’s all there for them ready to insert. Pretty cool, huh?

Sharing Your Google Calendar


Calendar 1


You can either make the calendar public, share with everyone in your GAfE domain, or with specific people. Sharing with the public or in your GAfE domain allows you to set event details: ‘See all event details’ or ‘See only free/busy (hide details).

Calendar 2


Sharing with specific people will allow you to give different permissions: ‘Make changes AND manage sharing’, ‘Make changes to events’, ‘See all event details’, and ‘See only free/busy (hide details).

Calendar 3

Mad Love For My PLN

Before I delve right into the reasons why I have mad love for my PLN, let me explain who exactly is in my PLN. When I first started teaching in the mid 90’s (that was just a few years ago, right?), my PLN was limited to those whom I directly worked with; those teachers in my building. Now my PLN stretches across the nation and across boarders. While I still enjoy, and learn much from, collaborating with those at my site/district, I often turn to Twitter for help, collaboration, and/or ideas. I also belong to several communities on Google+, thus widening my network. So when I say that I have ‘Mad Love For My PLN’, I’m talking about hundreds of people.

Now getting back to my story. Recently I have started video taping the school announcements. I have 5th graders read, record, and upload the ‘Morning News’. This was the brainchild of a Kinder teacher, Ellen Lynch. One of the biggest issues I was having were the actual announcements. The old way of doing things required teachers, and students in some cases, filling out a form in the office. I wanted to make it more streamlined and efficient. So what did I do? Well, I turned to a small portion on my PLN – Manhattan Beach CUERockStar Teachers. Yeah, mad love for these folks.

My PLN
                                             Mad Love for these folks

I reached out to this amazing group of educators. I explained the problem and was given a few great solutions. In the end, I chose to use a Google Spreadsheet Add-On, AutoCrat. I know what you’re thinking, “That’s great, but really, did you need to blog about that?” Yes, yes I did. I needed to blog about this for a few reasons A) My issue was solved within 24 hours. Not only did they provide their thoughts, but Reuben Hoffman also provided me with resources. B) I had a Google Hangout (GHO) with Alice Chen, Karl Lindgren-Streicher, and John Miller. What started out as just sharing thoughts and ideas, and me realizing I solved the problem already, quickly turned into a 45 minute talk about Minecraft. When you have a Minecraft Guru/Master/Ninja/all around awesome guy like John in your midst, you take advantage of his wisdom. C) EVERYONE has access to this type of support. D) It’s this support and collaboration that gets me excited, inspired, and and ready to try new things.

So yes, I did need to share my ‘Mad Love’ for these amazing people. I am blessed to have them in my PLN. And if you don’t already have these people in your PLN, you need to jump on Twitter and Google+ now and start learning from them now!

Student Demo Slams

If you have been to a Google Summit or other Googley type event, you have most likely witnessed a Demo Slam. For those of you who have not, a Demo Slam is where a presenter (anyone really) is given 3 minutes to show off their coolest, geekiest, most interesting tech ‘thing’. I have seen Demo Slams on tricks in YouTube, useful Chrome Extensions, tools in Google Docs, and Google Easter Eggs.

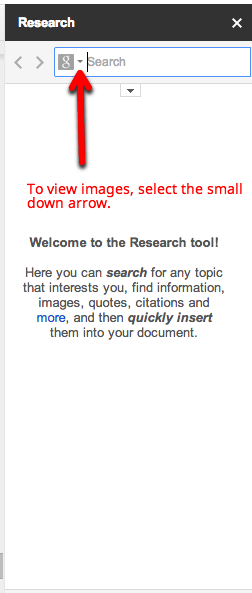
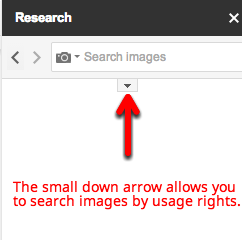
I began doing Demo Slams in my classroom. It began as a way to teach my students some simple tricks to help them in class. For example, I showed them ‘Build With Chrome‘, how to search images with reuse policies, and a few Chrome Extensions. It was a success from the beginning.

My story doesn’t end here. Not to be outdone, my students begged to begin doing them. You see, they like to ‘Out Geek’ me. They have each made it their mission to find a trick or two that I don’t know about. And yes, they have taught me so much! Of course I was thrilled that they wanted to do slams. So now I have a sign up sheet in my class. They can sign up for a slam anytime they want. I also have official time keepers. I just sit back watch, and learn new things from them.

One of the biggest successes came with ‘Build With Chrome‘. I briefly showed the tool, and as always encouraged them to explore it more on their own. I have a student who loves Minecraft, Legos, and creating, but is not big on getting up in front of the class and presenting. He took the idea and ran with it. He signed up for his own account, showed others what could be done with it, and ASKED if he could do a Demo Slam on it!

So pleased with their initiative, I have offered to share out the Demo Slams with other teachers. Recently, 2 girls went to a second grade classroom to show them a few keyboard shortcuts. I had 2 boys read about Anne Frank, and give a Demo Slam about what they read. Yeah, we decided Demo Slams don’t have to be tech related. It’s a HUGE success with my students. They are confident, learn from their mistakes, take chances, and freely share their knowledge. What more could a teacher ask for?

Google Presentation Background

So, say you like a particular Theme in Google Presentation, but not the color. Well, that is an easy fix!

1. Choose the desired Theme. For this example, I chose ‘Label’.

pic 1


2. Just above the slide, there is a toolbar. One of the options is ‘background’. (NOTE: be sure that the slide is selected – on left – NOT a space on the actual slide, otherwise you will not be able to see this option.)

pic 2


3. A pop-out window will appear. This is where you can select a new color.

pic 3


4. Select ‘Apply to all’ in order to have a uniform looking presentation. Then select the blue ‘Done’ button, and viola you have customized the Presentation Theme.

pic 4


pic 5