Calendar: Deleting A Calendar

I love using Google Calendar. It’s so easy to create multiple calendars to help me keep track of work, home, and other activities. However, there comes a time when I no longer need a calendar. For example, last year I created a calendar for my lesson plans. I don’t need that calendar any longer, nor do I need the daily emails with the agenda. There are also several calendars from past Google Classrooms that I no longer need. Here’s a quick guide on deleting unwanted calendars.

Navigate to your calendars. On the left side of the page find the section marked ‘My Calendars’ (if no calendars are listed, click on the down arrow next to the section). Locate the calendar you wish to delete and hover over it with your mouse. A small down arrow appears to the right. Select that go to ‘Calendar Settings’.

calendar-1

This will bring you to a new page with several options listed on the left side of the page. Scroll down to Delete Calendar. Then choose the ‘Permanently Delete this Calendar’ link.

calendar-2

A pop out window appears confirming your request. You will need to checkmark the box and select the ‘Delete for Everyone’ button.

calendar-3

That’s all there is to it for deleting a calendar.


Sharing Your Google Calendar


Calendar 1


You can either make the calendar public, share with everyone in your GAfE domain, or with specific people. Sharing with the public or in your GAfE domain allows you to set event details: ‘See all event details’ or ‘See only free/busy (hide details).

Calendar 2


Sharing with specific people will allow you to give different permissions: ‘Make changes AND manage sharing’, ‘Make changes to events’, ‘See all event details’, and ‘See only free/busy (hide details).

Calendar 3

Delete Calendar

Throughout the years, I have created a few different Calendars. This can become cumbersome, and I find the need to delete a Calendar from time to time. Here’s how to delete a Calendar:

From your Calendar page, locate the calendar you wish to delete. Your calendars are located under ‘My Calendars’. If you don’t see any, choose the arrow to the LEFT of ‘My Calendars’. All your calendars will be listed here. Once you have located the Calendar to be deleted, select the arrow to the right of desired calendar, and choose ‘Calendar Settings’.

pic 1


pic 2


You will be taken to a new page. Near the bottom of the page, you will see ‘Delete Calendar’ and ‘Permanently Delete This Calendar’

pic 3


Once you select the blue link ‘Permanently Delete This Calendar’, a pop out window will appear. It will ask if you want to Delete the calendar. Select ‘Yes’, then choose ‘Delete for Everyone’. Once you do that, the Calendar is deleted and will no longer appear the ‘My Calendars’ list.

pic 4

Insert Calendar Into Site

Recently I was asked if you could insert a SECOND calendar into a Google Site. The answer is YES!

Create a New Calendar

The process is simple. First, CREATE the new calendar. Make sure that the calendar is created in the same account that the Site is associated with. Choosing the arrow to the right of ‘My Calendars’ will give you the option to create a new calendar.

pic 1

This will take you to a new page where you will name your new calendar (1.). If you would like your calendar public, which you probably do if it’s on a website, be sure to choose the  “Share with Others’ then ‘Make This Calendar Public’ options on the page (2.). Once you have set up your calendar, remember to ‘Create Calendar’ (3.).

pic 2

Your new calendar will now appear under ‘My Calendars’ on your Google Calendars Page.

pic 3

Now you are ready to insert information on your new calendar.

Insert New Calendar Into Google Site

Locate the Site and Page you would like to insert your new calendar. Enter ‘Edit Mode’ on the Site – choose the pencil icon at the top right of the page (or press e on the keyboard).

pic 4

This will then bring up editing options. Find ‘Insert’, then ‘Calendar’.

Pic 5

A new window will appear, choose the desired Calendar. Then, choose the blue ‘Select’ button. From here, a new screen will pop up. This will allow you to set the properties of the calendar on your Site. Remember to choose the red ‘Save’ button when you are done.

pic 6

pic 7

Now that you have inserted your new calendar, remember to ‘Save’ the page (located at the top right of the page). You will now see your new calendar.

pic 8

Default Calendar Setting

Today I held a training for some on Google Apps. We touched on Calendar. Some wanted to know how to change the default setting from Week view to Month view. Here’s how:

  1. Go to your calendar
  2. Find the gear on the right and click on it
  3. Go down to Settings
  4. On the left side, scroll until you find ‘Default View’
  5. Choose your desired view
  6. Save

And there you have it! Easy as pie. In case you aren’t sure, here’s a video for you:

Google Calendar

Google Calendar is a wonderful tool with many features. This is just a basic overview. We will go over creating a calendar, adding events, and adding your calendar to your email page — makes it super easy to see what’s coming up.

First, log into your account and go to Calendar. You can do this by going to the top bar or Calendar when you first log in.

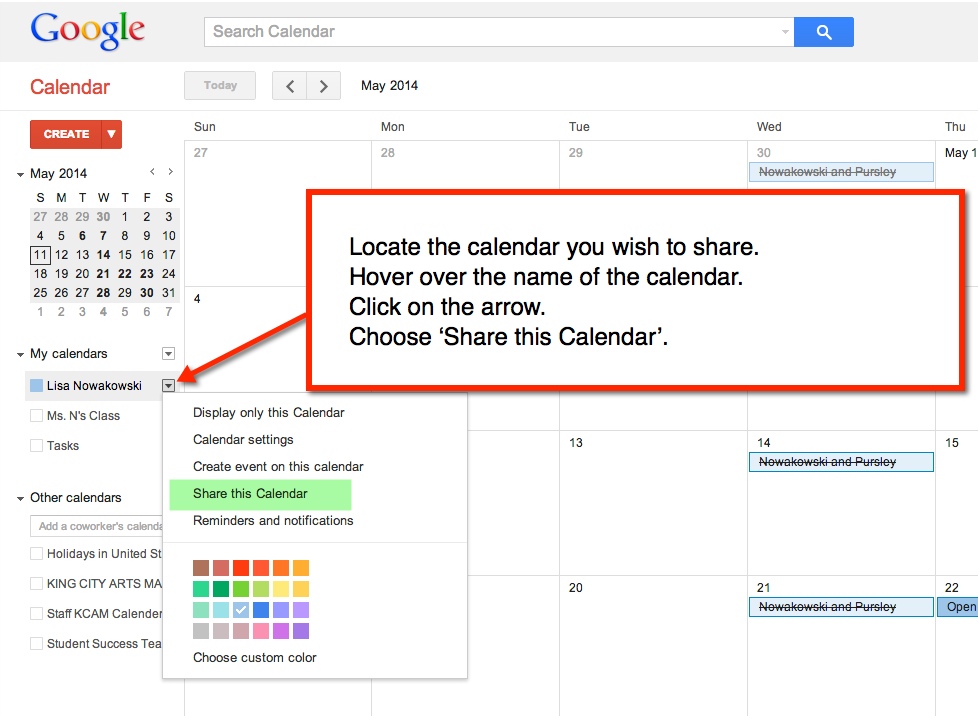
 You will now create your own calendar. Find the ‘My Calendars’ section. Just to the right of that, there is a small arrow. Click on the arrow to create a new calendar.

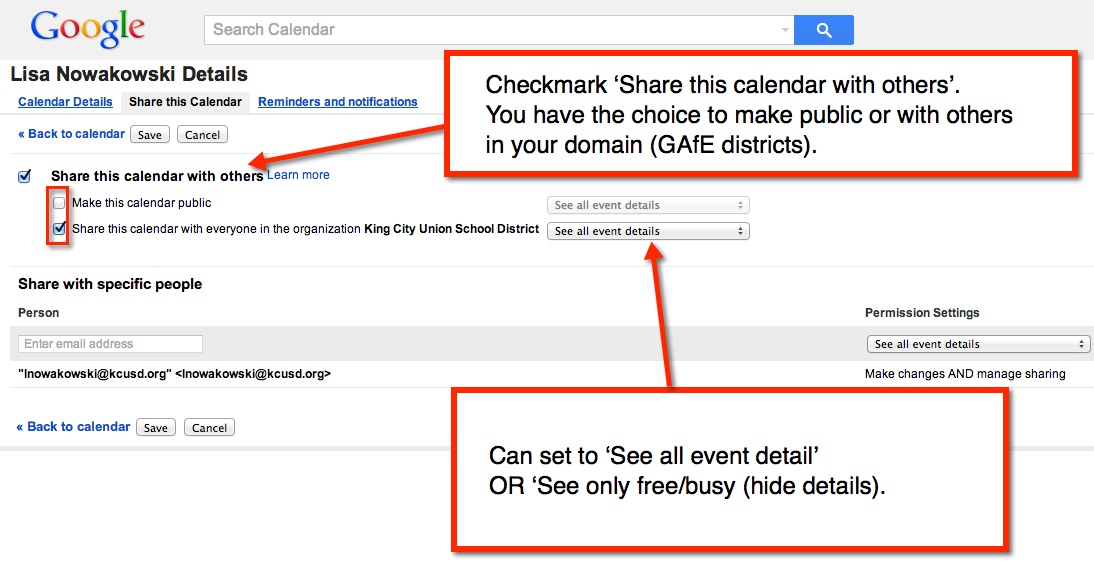
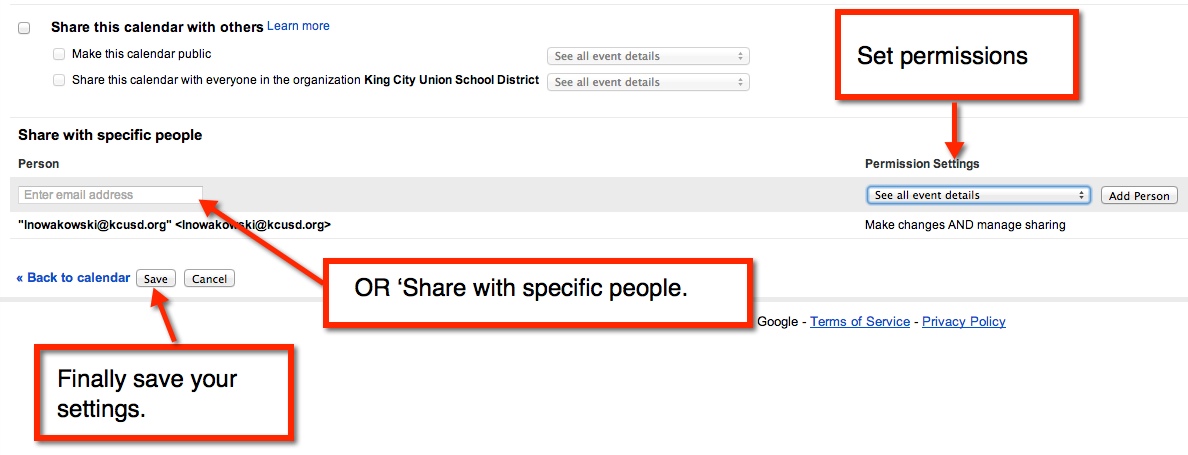
Next, fill out the information for your calendar. If you would like to add this calendar to your website, be sure to check the ‘public’ option. You also have the choice to share your calendar with a few. Simply input their email addresses. When all information has been added click the ‘Create Calendar’ button located at the bottom of the page. This will then take you back to your calendar.

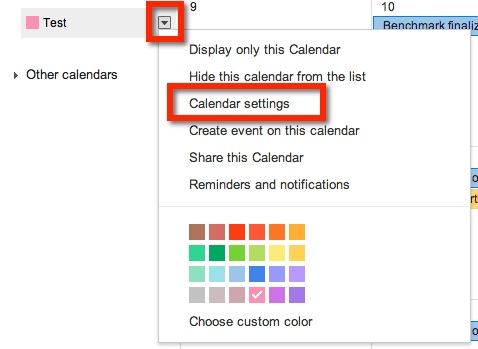
To view your calendar(s) click the small arrow to the left of ‘My Calendars’. Yours will be listed with separate colors for each calendar. To view other calendars, click the small arrow to the left of ‘Other Calendars’. You can add a variety of calendars, including friends. To view, and add, other calendars click on the small arrow to the right of ‘Other Calendars’ — the small arrow with a box around it. Holidays & Moon Phases calendars can be found under ‘Browse interesting calendars’. Once you find one that you like, you can ‘subscribe’ to it.

Add an Event:

The quick option is to click on the date of choice and fill in the information.

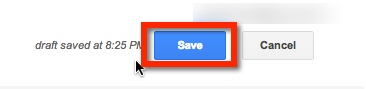
The other option is to ‘double click’ on the desired date and fill in the information. Remember, if you want the information to be posted on your webpage calendar, choose the ‘Public’ option. Save all information when you are done.

Joining Other Calendars:

You will receive an email notification that you have been added to a Calendar — by say your lovely secretary, to view the school’s Calendar. The Calendar will automatically be added to your Calendar page under ‘Other Calendars’.

View Calendar on Your email Page:

Going back to your email page, you will click on the ‘Gear’ on the right and choose ‘Settings’

From the ‘Settings’ page, you will go to the ‘Labs’ tab. Scroll down until you find ‘Google Calendar’. Once you have located it, be sure to ‘Enable’ the lab. Finally, ‘Save all changes’. This button can be found at the top or bottom of the page.

You can now easily switch between the ‘Chat’ option and the ‘Calendar’ by clicking on the icons at the bottom of the left column.


Soon, I will discuss how to add an attachment and ‘event flair’ to an event!