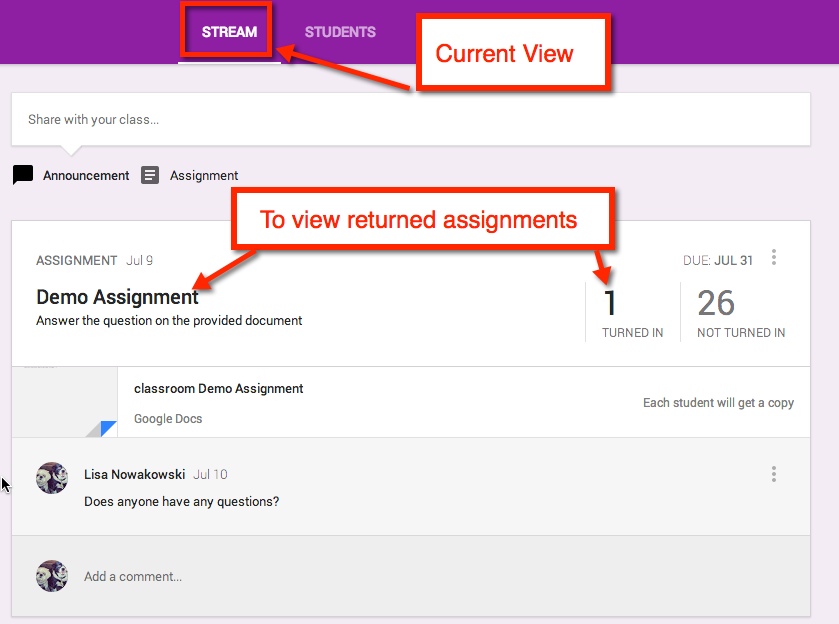
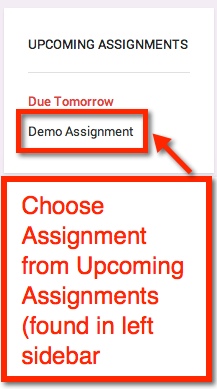
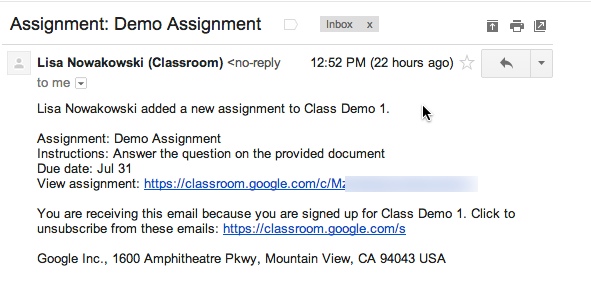
In your stream, you can easily view returned assignments. Either choose the title of the assignment or ‘Turned In’. The left sidebar will show all upcoming assignments as well.
Student Submission Page:
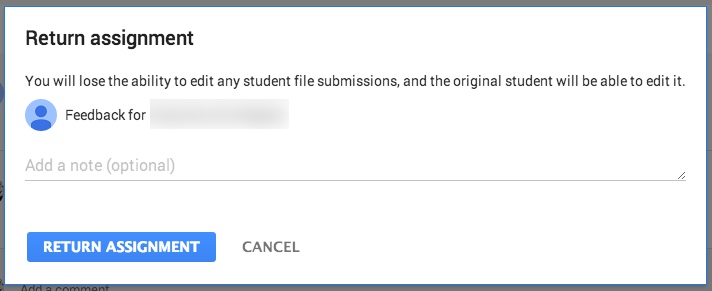
This allows you to view the status of all students’ assignments, private conversations with students, set point value, grade, and return assignments.
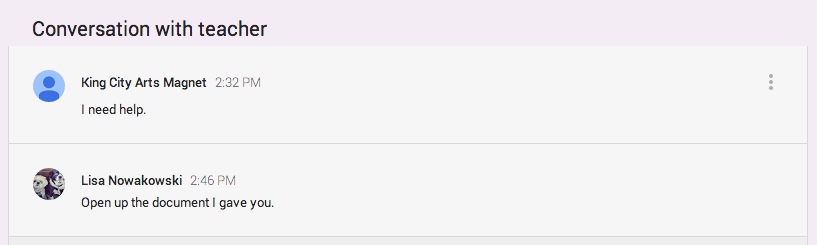
Private Conversation:
If the student has a comment or question, they can easily talk with you about it privately.
Scoring and Returning:
In Google Drive:
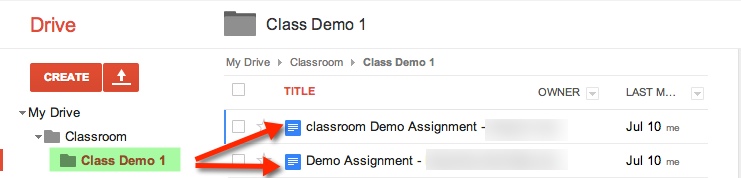
When you create a class, or students are enrolled in a class, Google automatically creates a Classroom Folder in your, and the student’s, Drive.
Student’s Drive:
In the Classroom Folder, the student is enrolled in 1 class, Class Demo 1. Whenever an assignment is created, it is automatically placed in this folder.
Teacher’s Drive:
In addition to the Classroom Folder and the Class Folder, teachers will also find that each assignment has a folder (within the assigned class) and a Templates Folder. The Templates Folder is a collection of all Google Created assignments for that class.
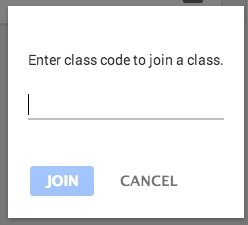
Students can either enroll themselves by inputting a Class Code or teachers automatically enroll them. Currently students are NOT notified when they are enrolled in a class, if the teacher automatically enrolls them.
When a student first opens up their Classroom, it will look very much like the teacher Stream view, with a few differences
The students will also be able to see who is in their class.
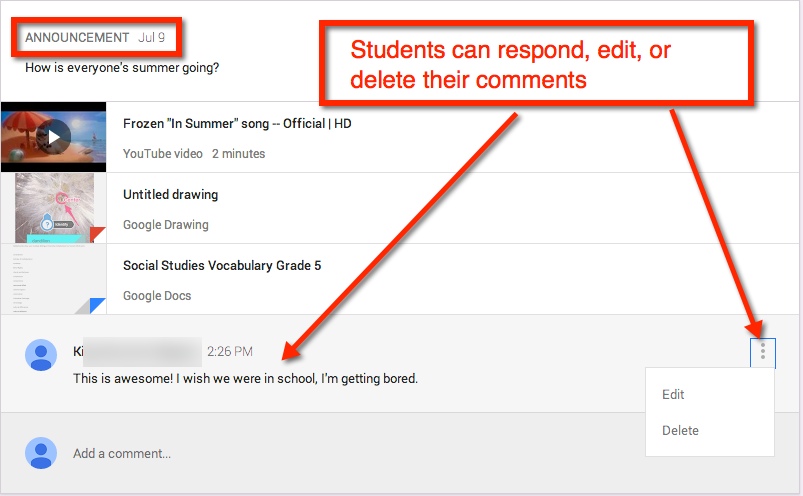
See and Comment on Announcements:
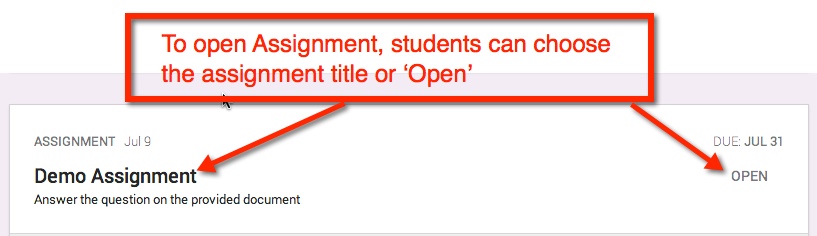
Assignments:
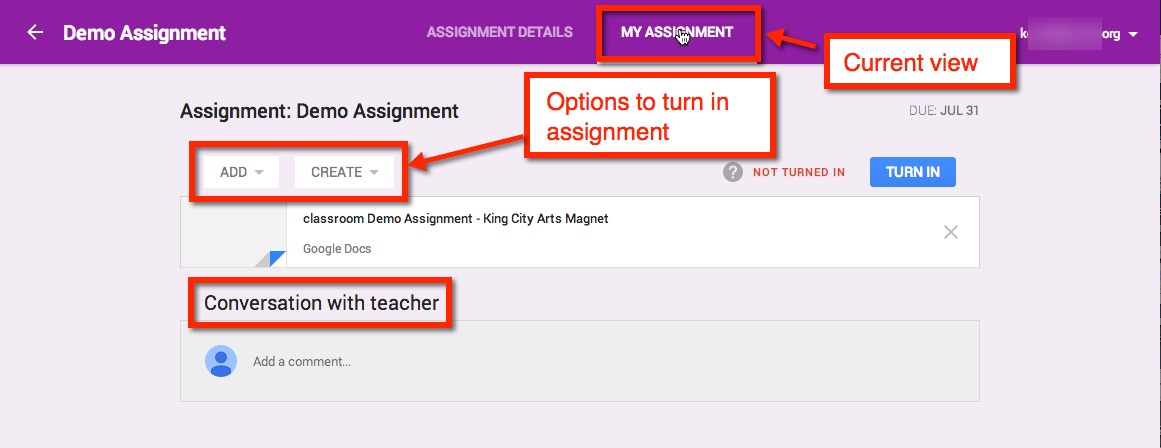
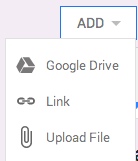
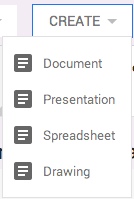
If the student needs to create the assignment – meaning the teacher did not create a document and share with student(s) – They have several options in which to upload or create.
If the student has a question or comment, it can be made in this stream privately.
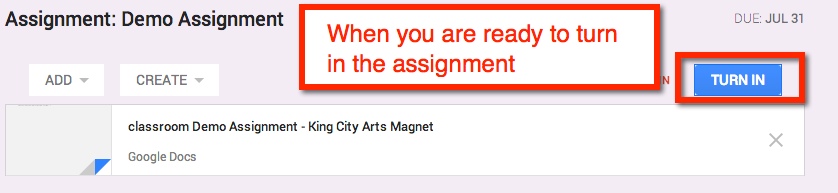
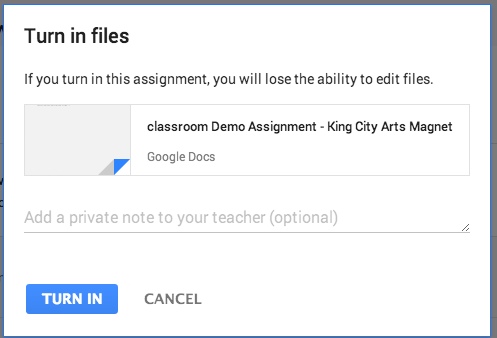
IF the teacher shared a document with the student(s), then the document title can be chosen and it will open in a new window. The student(s) can then edit in that document. Once the assignment is completed, the student can turn in the document from the Assignment Page.
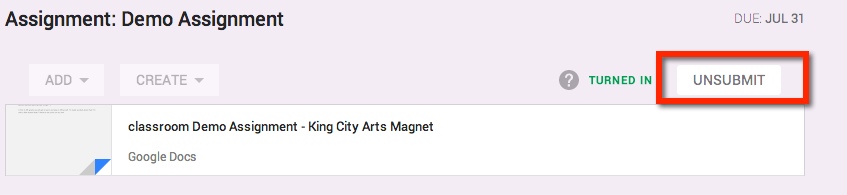
If the student realized that they made a mistake, they can ‘Unsubmit’ the assignment.
Viewing Score:
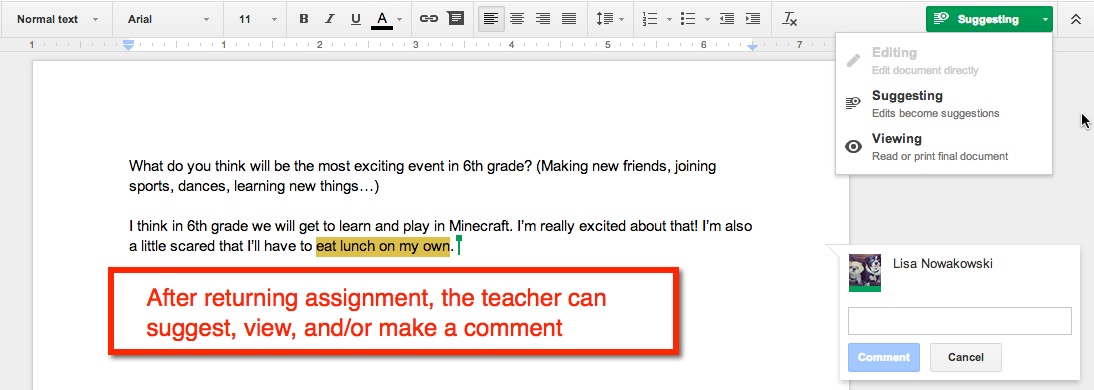
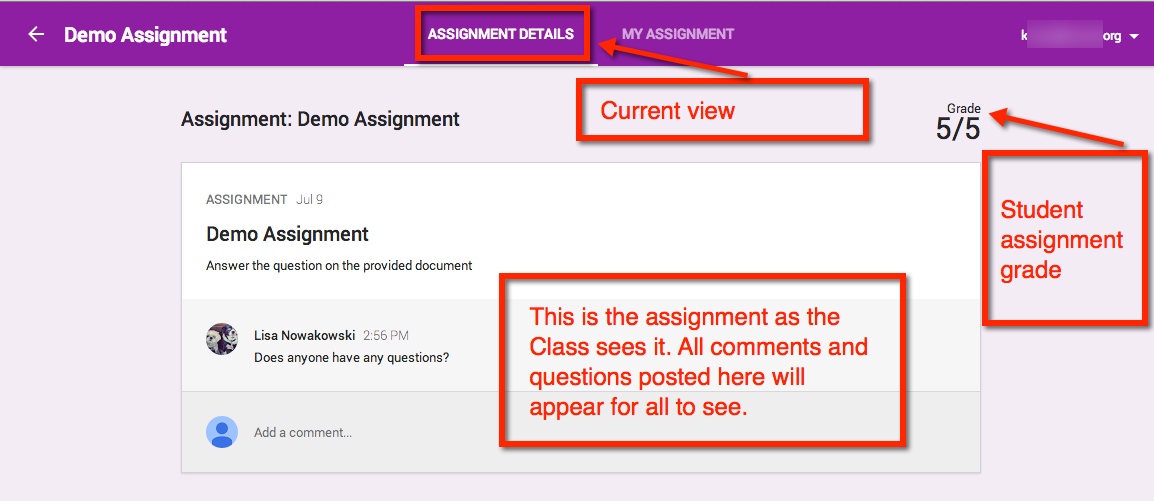
Once the teacher has graded the assignment, it will be ‘Returned’ to the student. The student will have full editing rights (the teacher will be given commenting rights). They can view the score and any comments in My Assignment page. When the student views the score from their Assignment Details page, they will only see comments made to the entire class. Private comments between the teacher and student are on My Assignments page.
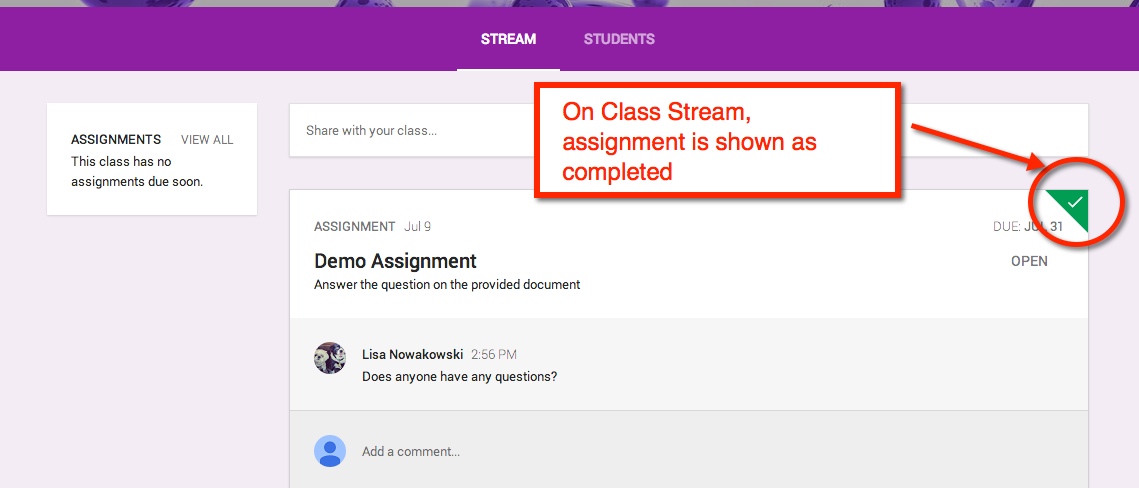
When the student has submitted an assignment, it will be noted in their Stream.
Other Information:
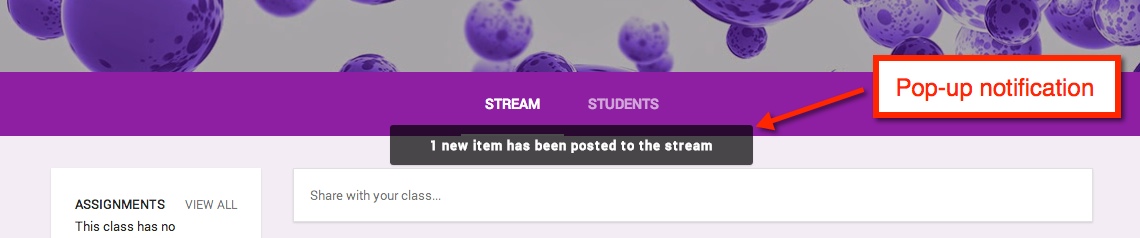
If an announcement or assignment is created while the student is in the Class, a notification appears.
Notification:
When an Announcement or Assignment is created, the student will receive an email notification.
Okay, so now that you have your Classes set, you want to start creating Announcements and Assignments.
Create Announcement
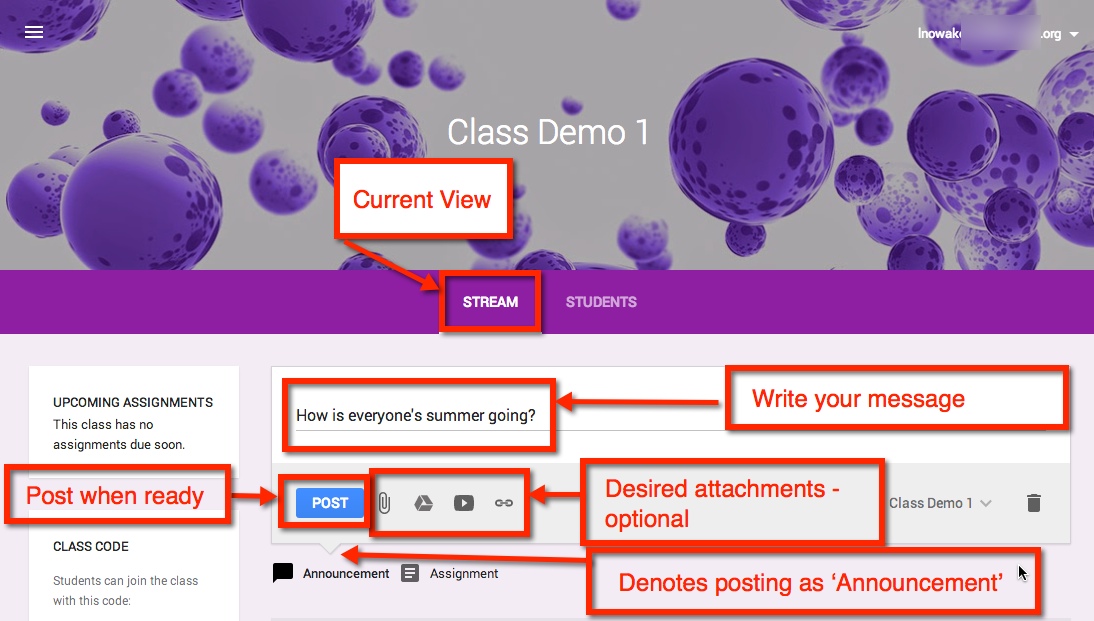
Once you are in the Class in which you would like to create an Announcement, make sure that you are viewing the Class Stream. The default is set to create Announcements, but you’ll want to make sure by looking for the downward notch is above ‘Assignment’. You can post your announcement solo or attach a file, something from Google Drive, a YouTube video, and/or a link. Select the blue ‘Post’ button, and you’re done.
Note: Students will have ‘View Only’ rights to any attachment found in your Google Drive.
Edit/Delete Announcement
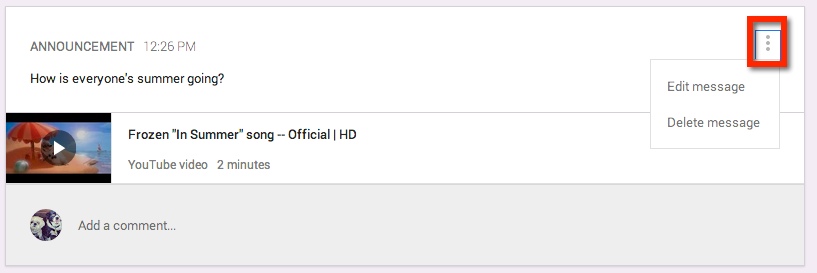
Once you have created your Announcement, you can either edit or delete it by choosing the three (3) dots at the upper right corner of the Announcement.
Creating an Assignment
The process for creating an Assignment is very similar to that of creating an Announcement. You have the additional options to set a Due Date and Time.
Note: You determine how items from your Google Drive are shared – view only, all students can edit the document, or make a copy for each student.
Same Assignment and/or Announcement: Several Classes
One nice feature is that you can share the same Announcement or Assignment in several Classes without having to post in each class. By choosing the drop down arrow at the lower right corner, you can select which Classes you would like it to appear.
Turned In Assignments
After you have posted your Assignment, you can easily see how many students have turned in the Assignment.
Edit/Delete Assignment
As with Announcements, you can Edit or Delete the Assignment by selecting the three (3) dots in the upper right corner of the Assignment.
In June, Google started sending out invitations to Beta testers for Google Classroom. Google Classroom is a management tool for your GAfE account. It allows users to create classrooms in which you can assign work – YouTube videos, links, anything from Google Drive, or other files you may have stored elsewhere. In addition, you can also create announcements where students can interact with you and each other.
Currently Google is gathering feedback from all users. I am sure in the true Google ‘Spirit’, they will continue to modify and iterate (they are the masters of iteration) their latest tool.
Getting Set Up
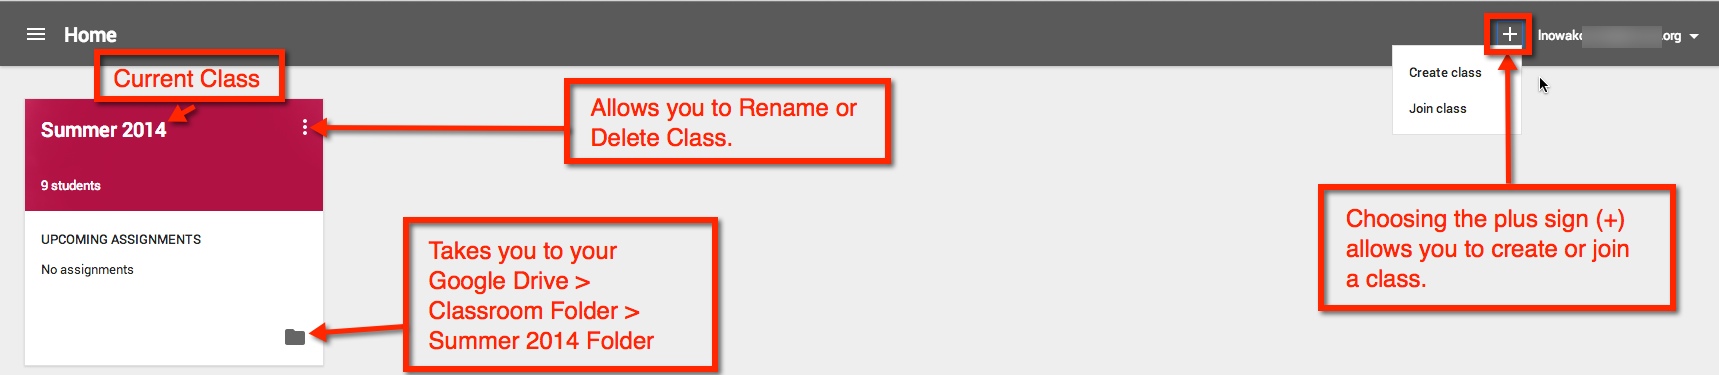
So here is a BASIC overview from the teacher’s viewpoint. When you first open Google Classroom, a folder (Classroom) is automatically created for you in your Google Drive. Once open, you will be taken to the ‘Home’ screen. Here I have a current class set up and have highlighted some of the features available. If it is your first time, you can easily set up a class by choosing the plus sign (+) next to your user information at the top right corner.
Creating a Class
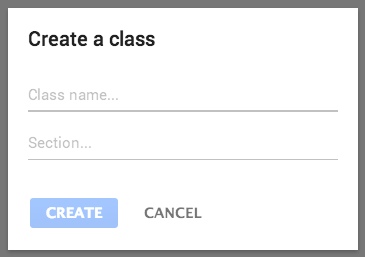
Looking at how to ‘Create a Class’: A pop-out will appear, and you will be guided on how to create a class. You can then create classes for each class or period needed.
Inside a Class
Once your class is created you will be taken to the class ‘Stream’. This is where you can add students, create announcements and assignments. You will also be given the option to ‘Take a Tour’.
Change Picture
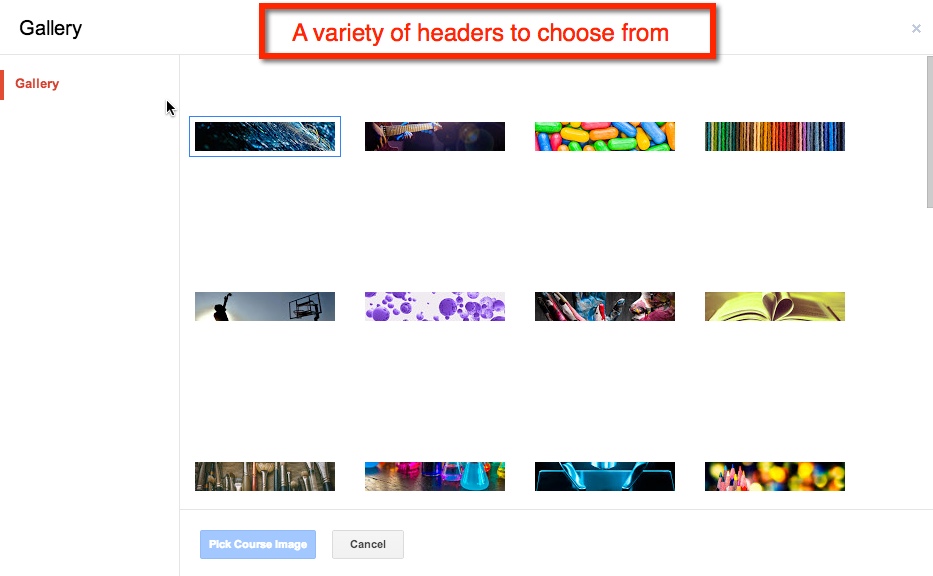
So you’re not fond of the purple bubbles? Not a problem. When your cursor hovers over the header, the option to ‘Change Picture’ appears in the lower right corner of the header. Once you choose that other options will appear.
Manually Assigning Students
As I am in an elementary self-contained classroom, I find it easier to sign my students up myself. However, if you are dealing with multiple classes, it might be easier to have them sign up via the ‘Class Code’.
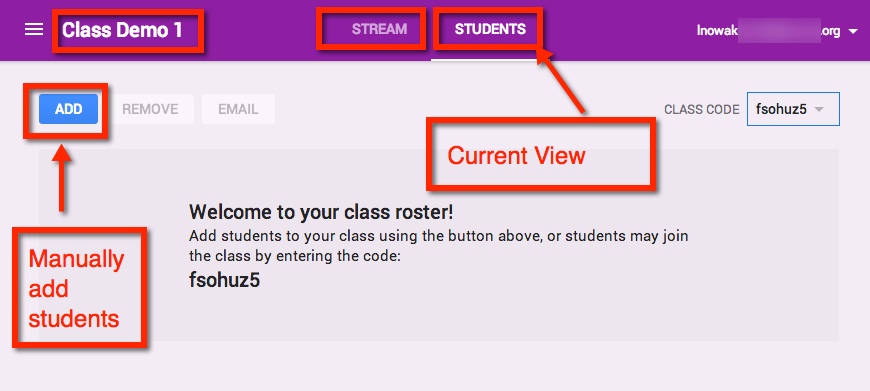
Adding your own students only takes a few simple clicks. Start by switching your current view from ‘Stream’ to ‘Students’.
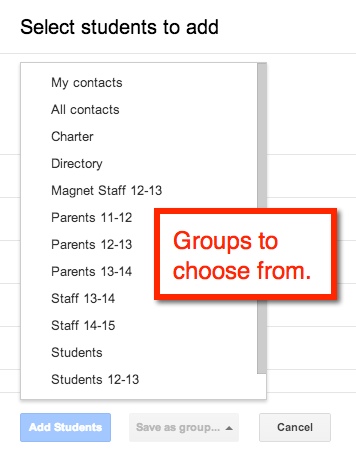
To manually add students choose the blue ‘ADD’ button. I can then either checkmark students from my contact list or select an entire ‘group’.
Join With a Class Code
When students go to their ‘Classroom’ for the fist time, they should choose the plus sign (+) at the top right corner next to their user information. This gives them the option to ‘Join a Class’ using the class code.
One of the best features of CUE RockStar events are the small sessions. Because the sessions are generally 10:1 – or smaller in some cases – AND 2 hours, attendees truly get individualized attention. Everyone gets to experience the tools and ideas first hand while surrounded by knowledgable educators. The energy in the sessions is amazing. We are all learning from one another!
For me, one of the most memorable sessions was one in which a high school teacher was inspired to recreate her assessments. She had her students reading The Glass Menagerie. After discussing different tools, she decided to play around with Animoto. One thing led to another and soon her excitement let to a whole new way of assessing her students on the book. She created a video for her students to watch. From here, her students will respond to the prompt creating a video using Animoto! It was such an awesome idea, and she was so enthusiastic and inspiring I just had to share this story.
This is why I LOVE CUE RockStar!
Unfortunately, I do not have the teacher’s example, but I do have an example of something that my students created on Animoto.
This year I had my 5th graders writing their state reports in Google Docs. One of their tasks was to create a Table of Contents. Normally this is painful – mainly for me. While they understand the concept, they often list ALL the pages in a topic. This year I avoided that by using the Table of Contents feature in Google Docs. It was ridiculously easy!
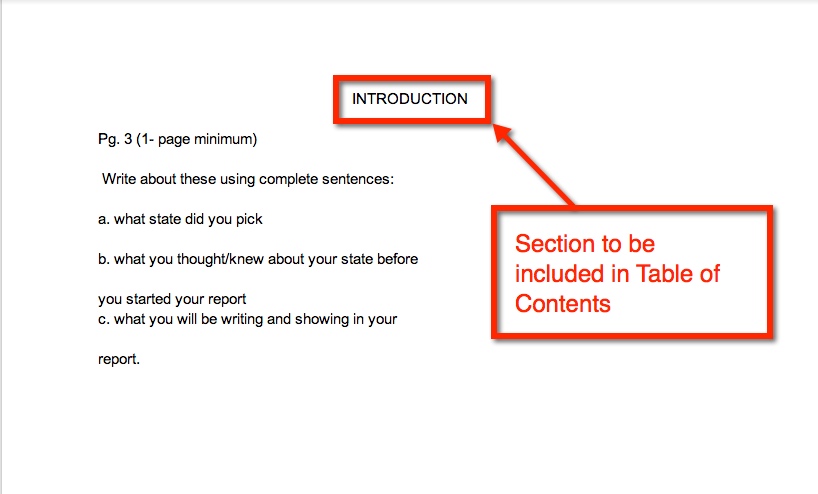
In their state report they changed the text of each heading from ‘Normal Text’ to ‘Heading 1’
Repeat this process for all sections that need to be added to the Table of Contents. Once you have done this, you can now insert the Table of Contents. Go to the Table of Contents page and place the cursor where you would like the Table of Contents to be submitted. Then insert your Table of Contents.
This is what you get. You have hot links to the different sections in a document.
I think I’m in LOVE! Yes, I love the EasyBib Bibliography Creator in Google Docs (via Add-Ons). Back in the day when I went to school and wrote reports – only a few short years ago – I had to look up how to cite my sources in a book. Today, all you have to do is type a few bits of information, and the citation is created for you! See, you’re falling in love too, aren’t you?
My 5th graders have no idea how easy they have it. Here’s how it works:
And in case you were wondering, it does save as you work. My 5th graders have been working on their State Reports for a few weeks. As they find resources, they add it to the EasyBib. When they are ready to add it to their Doc, it’s all there for them ready to insert. Pretty cool, huh?
The other day I had an awesome lesson planned teaching coordinates. I was going to use geoboards (NOTE: I found the plan at Howard County Public Schools Wiki). While I was teaching the lesson, one of my more creative thinkers modified it and made it into a game. Yesterday, the student tried to explain the game to me. I’ll admit, I didn’t get it. After completing an assigned task on coordinates, he drug out two geoboards and showed another student how to play. Okay, they’re learning and focusing on the standard. Today, the same students begs me to show the class his game. I, of course, agree.
I’ll admit, I still don’t totally understand it, but I let him explain it to the rest of the class. Apparently, it’s just me. Everyone else seemed to understand what to do. So here’s how it goes…
Both players have geoboards and create a shape on their boards. Then each player tries to guess the coordinates of the shape – Battleship style. Now this is where I get confused. The player is to remember where they had a ‘hit’. If the player gets a ‘hit’ they get another turn. When a player has found all points, the rubber band is lost to the opposing player.
I got lost at ‘you just remember where you had a ‘hit”. Well, the students seemed to be up for it. As they played, they each modified it to fit their own needs. I, for one, used cubes to mark my ‘hits’. while others plotted them out on graph paper. And don’t even get me started on the intricate designs some of them came up with! All in all, a good time was had by all, and my creative student felt like a ROCKSTAR!
Accelerated Reader (AR) seems to be all the rage in my district. All the elementary schools use it, and have for quite some time. Many teachers seem to be huge supporters of it, too. I however, have never been a big fan of AR. I will admit that my bias comes from personal experience rather than that of a pedagogical reason. I have never banned my students from using it, but never really pushed it either.
Their website states: “At its heart, AR is simple. Students read a book, take an AR Quiz, and get immediate feedback. Kids get excited and motivated when they see their progress.”
This lead me to wonder why my students aren’t taking AR tests. They read 30 min each day – a book of their choice. They read an additional 20 pages each night – a book of their choice. They are reading, and talking about what they are reading! So why aren’t they taking the tests at the end? They can earn prizes once they reach certain percent of their overall goal. What was the problem?
The Discussion
I truly did want to find out why the students weren’t taking the tests. So I sat down with them and had an open discussion with them. At first they were reluctant to answer, but once they got started, their answers blew me away! 10 year olds are way smarter than we give them credit for. They were so mature about the subject, I recorded their answers. Here’s a small sampling:
“I don’t think there’s any purpose in taking an AR tests because I read books to enjoy them, not take tests on them.”
“When I finish reading a book, I just don’t do the AR quizzes because I want to get to the next one [book] really fast so I can continue reading.”
“There’s no purpose for me, because I want to get to the next book fast. And anyway, what’s the point of getting a prize? … We don’t really need a prize.”
“…They’re giving you prizes just to make you read…”
“Instead of making us read, we should read because we want to.”
“We should be reading for the joy of books, not for prizes.”
“They need a wider variety of different genres of books.”
“The books I do have, are not AR books.”
“I just like to enjoy a book.”
What Have I Learned?
1 -My students are way smarter than I ever gave them credit for.
2 -By the age of 10, kids have figured out that AR is a scam.
3 -AR has NOT instilled a love of reading.
4 -Students gained a love of reading on their own, sans prizes!
5 -AR books and genres can be too limiting for some students.
6 -My students do not see eye to eye with the AR website. Clearly they are neither motivated nor excited by the AR quizzes.
Other Thoughts
Some students live for competition. Some students love the bragging rights they get when they have read the most (percentage) in the school. Some students enjoy receiving the prizes, although I would venture to say this is a greater motivator in the younger grades than upper. The idea that we are monitoring student comprehension is a good one, I’m not sure AR is the answer.
At the beginning of the year, I was having students create ‘Book Projects‘ when they finished reading a book. I soon became overwhelmed. I’m thinking I need to revisit this idea and rework it so that it works for me too. I had some great work produced by the students. It was more meaningful, and the students really got into it.