Okay, so now that you have your Classes set, you want to start creating Announcements and Assignments.
Create Announcement
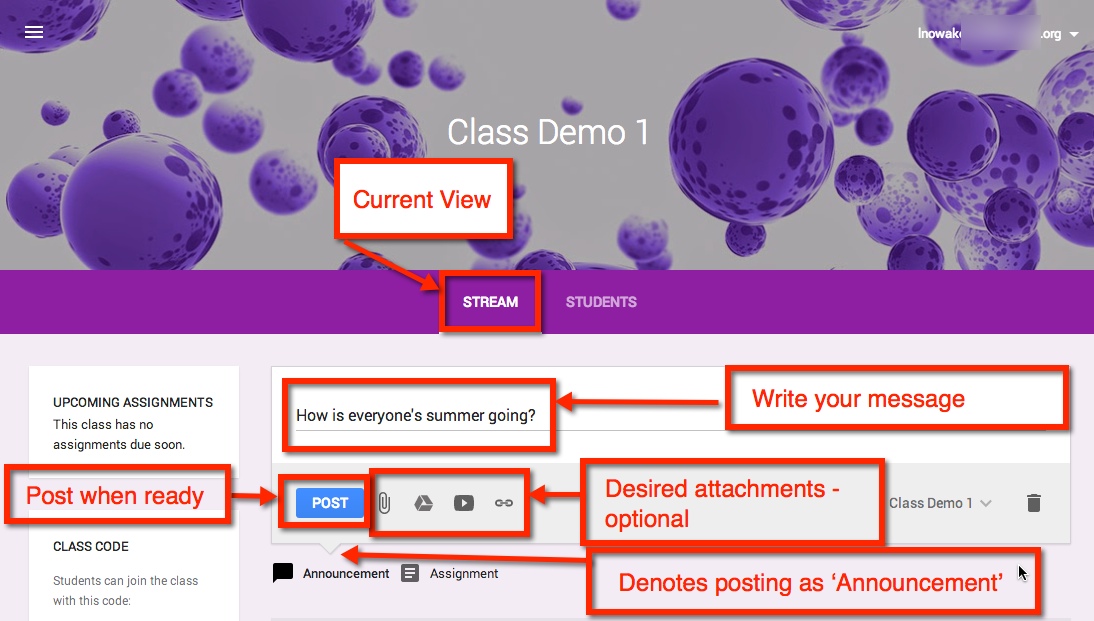
Once you are in the Class in which you would like to create an Announcement, make sure that you are viewing the Class Stream. The default is set to create Announcements, but you’ll want to make sure by looking for the downward notch is above ‘Assignment’. You can post your announcement solo or attach a file, something from Google Drive, a YouTube video, and/or a link. Select the blue ‘Post’ button, and you’re done.
Note: Students will have ‘View Only’ rights to any attachment found in your Google Drive.
Edit/Delete Announcement
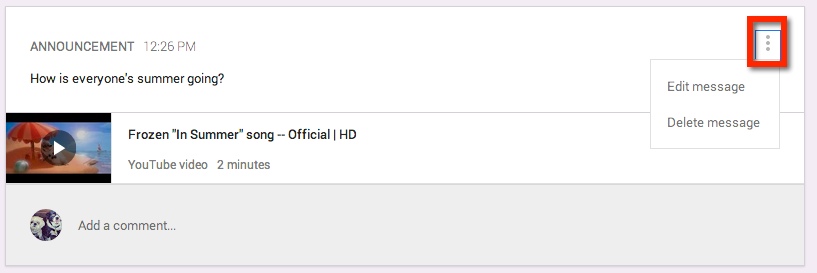
Once you have created your Announcement, you can either edit or delete it by choosing the three (3) dots at the upper right corner of the Announcement.
Creating an Assignment
The process for creating an Assignment is very similar to that of creating an Announcement. You have the additional options to set a Due Date and Time.
Note: You determine how items from your Google Drive are shared – view only, all students can edit the document, or make a copy for each student.

Same Assignment and/or Announcement: Several Classes
One nice feature is that you can share the same Announcement or Assignment in several Classes without having to post in each class. By choosing the drop down arrow at the lower right corner, you can select which Classes you would like it to appear.

Turned In Assignments
After you have posted your Assignment, you can easily see how many students have turned in the Assignment.

Edit/Delete Assignment
As with Announcements, you can Edit or Delete the Assignment by selecting the three (3) dots in the upper right corner of the Assignment.


One thought on “Google Classroom – Part 2”