Google Classroom – Part 1

What is Google Classroom?

In June, Google started sending out invitations to Beta testers for Google Classroom. Google Classroom is a management tool for your GAfE account. It allows users to create classrooms in which you can assign work – YouTube videos, links, anything from Google Drive, or other files you may have stored elsewhere. In addition, you can also create announcements where students can interact with you and each other.

Currently Google is gathering feedback from all users. I am sure in the true Google ‘Spirit’, they will continue to modify and iterate (they are the masters of iteration) their latest tool.

Getting Set Up

So here is a BASIC overview from the teacher’s viewpoint. When you first open Google Classroom, a folder (Classroom) is automatically created for you in your Google Drive. Once open, you will be taken to the ‘Home’ screen. Here I have a current class set up and have highlighted some of the features available. If it is your first time, you can easily set up a class by choosing the plus sign (+) next to your user information at the top right corner.

classroom 1

Creating a Class

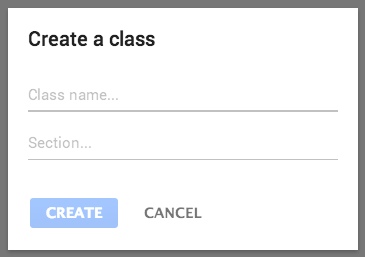
Looking at how to ‘Create a Class’: A pop-out will appear, and you will be guided on how to create a class. You can then create classes for each class or period needed.

classroom 2

classroom 3

Inside a Class

Once your class is created you will be taken to the class ‘Stream’. This is where you can add students, create announcements and assignments. You will also be given the option to ‘Take a Tour’.


classroom 4classroom 5


Change Picture

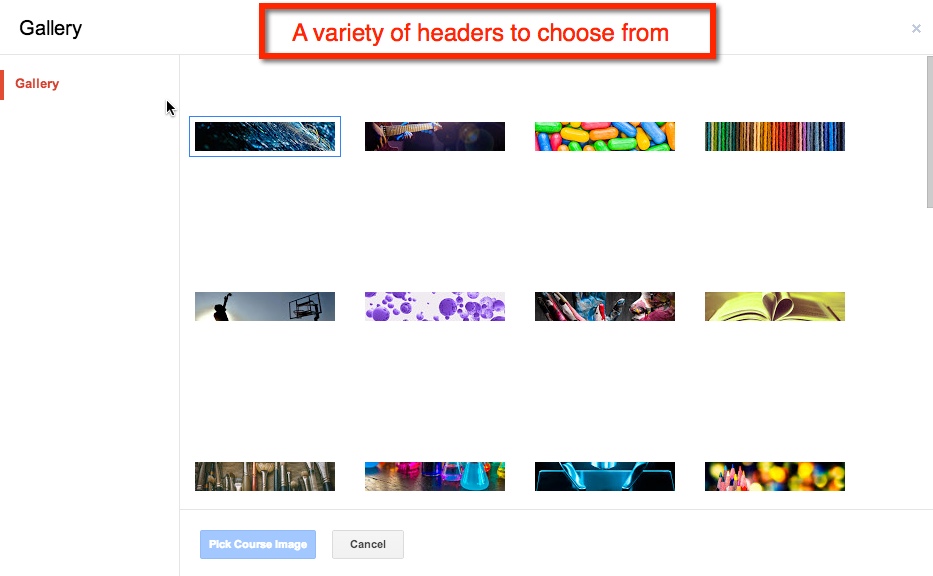
So you’re not fond of the purple bubbles? Not a problem. When your cursor hovers over the header, the option to ‘Change Picture’ appears in the lower right corner of the header. Once you choose that other options will appear.

Classroom 0

Classroom 00

Manually Assigning Students

As I am in an elementary self-contained classroom, I find it easier to sign my students up myself. However, if you are dealing with multiple classes, it might be easier to have them sign up via the ‘Class Code’.

Adding your own students only takes a few simple clicks. Start by switching your current view from ‘Stream’ to ‘Students’.

classroom 6

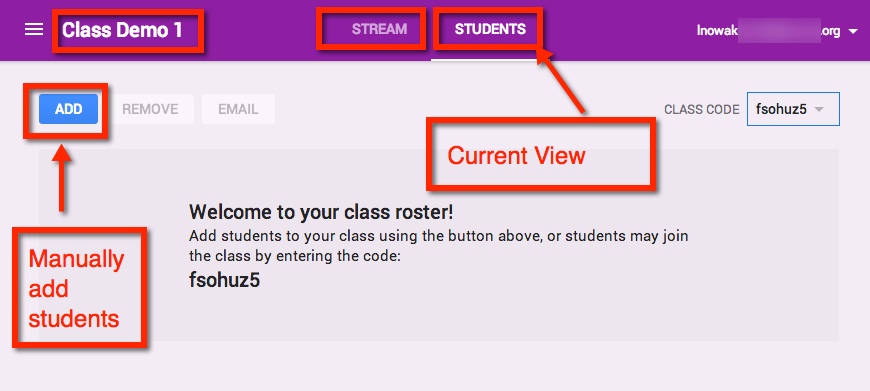
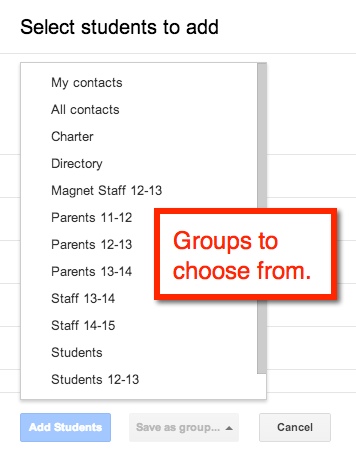
To manually add students choose the blue ‘ADD’ button. I can then either checkmark students from my contact list or select an entire ‘group’.

Classroom 7

Classroom 8

Join With a Class Code

When students go to their ‘Classroom’ for the fist time, they should choose the plus sign (+) at the top right corner next to their user information. This gives them the option to ‘Join a Class’ using the class code.

Classroom 9


Outta Site

Chromebook Scavenger Hunt

Student e-Portfolio Template

Colour Lovers – create patterns from palette


Check out Scott Burt’s Sites info
Website
SLOCUE Connects – 10/4/14 (To view videos, go into Presentation Mode – upper right corner of screen)

Prepared for CUE RockStar 2014 edition:

Link for the collaborative document:

How to embed a NON-YouTube video on Google Sites:

Horizontal Navigation Bar:

Edit Sidebar:

Embed Blogger into your site:

Presentation Background Image

I have previously blogged about how to change the background color of a Google Presentation Slide Template. So this time, let’s take it up a notch. Let’s add a background image to your Slides!

To begin, open Presentation, and choose ‘Simple Light’ as your template. Then from the tool bar, choose ‘Background’.


background 1


background 2

For this example, we will focus on uploading an image from your computer.

Background 3


You can either drag the image or choose to upload from where the image is stored. Let’s look at how to upload the image.

Background 4

When I choose the blue ‘Choose an Image to upload’, a pop-out window appears. Mine automatically shows everything on my desktop (1.). I can also choose a different location on my computer (2.). The image I desire is on the desktop (3.), therefore, I choose it, and scroll down to the ‘open’ button (or I can double click the desired image).

Background 5


I am then given the option to add the image to current slide (1.) or to add image to all existing slides (2.).

background 6


And there you have it, a unique background to your Presentation!

background 7

Table of Contents – Google Docs

This year I had my 5th graders writing their state reports in Google Docs. One of their tasks was to create a Table of Contents. Normally this is painful – mainly for me. While they understand the concept, they often list ALL the pages in a topic. This year I avoided that by using the Table of Contents feature in Google Docs. It was ridiculously easy!

In their state report they changed the text of each heading from ‘Normal Text’ to ‘Heading 1’

toc 1

toc 2

Repeat this process for all sections that need to be added to the Table of Contents. Once you have done this, you can now insert the Table of Contents. Go to the Table of Contents page and place the cursor where you would like the Table of Contents to be submitted. Then insert your Table of Contents.

toc 3

This is what you get. You have hot links to the different sections in a document.

toc 4


Add-Ons – Google Documents

There are many additions that you can add to your Google Drive. For this post, I will specifically talk about Google Documents. An Add-on is simply a tool that makes your life easier. Some examples are: Easy-Bib, Doctopus (great for teacher management – EDU), and a thesaurus.

So how does one get Add-ons? Well, it’s super easy:

Add on 1

add on 2


You can scroll through the options or do a search in the search bar (upper right corner or pop-out menu).

add on 3


Once the desired Add-on is selected, you will need to add it. Simply select the blue ‘free’ (or if there is a cost, the amount will appear) bar located in the upper right corner of the pop-out menu.

add on 4


Another pop-out menu will appear. It will request that you accept their terms.


add on 5


Once you accept, the Add-on will be found under ‘Add-ons’ in the tool bar menu.

add on 6