Google Classroom: Create Question

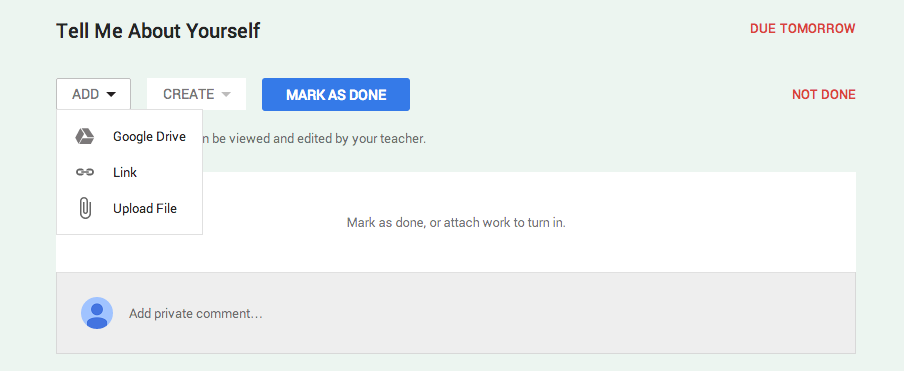
In Google Classroom, I like to ‘Create a Question’ for quick checks or exit tickets. They are easy to create and manage. Students can read each other’s posts, comment, and have quality discussions with ‘Questions’. This is an underused tool by many who use Google Classroom. It truly is a hidden gem in this tool.

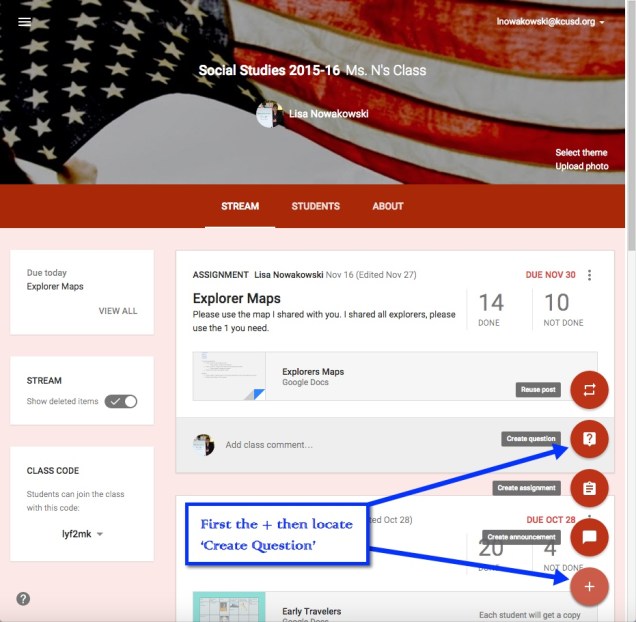
In order to create a Question, choose the + located in the bottom right corner of the ‘Stream’ section of your classroom.

Question 1

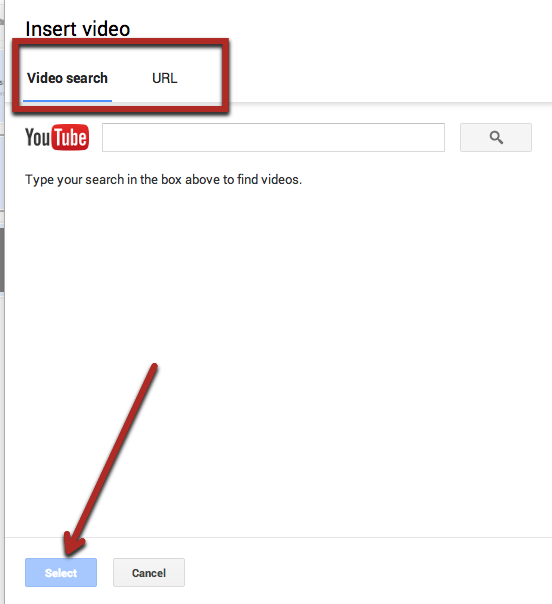
Now I can create my question. I can insert a file, something from my Google Drive, a YouTube video, and/or a link to a website. I can insert as many items as needed. Since I teach 2 classes of Social Studies, I can assign the question to both classes, with files and links, at the same time. I can even set a due date. When I have my preferences set, I choose the blue ‘ASK’ button.

Question 2

Next a pop-out window appears where I can allow students to view each other’s responses, or not. I can also allow students to edit their own responses. I like to allow students to comment on each other’s. This allows for discussion and opportunity for students to defend their positions. When I’m ready, I click the blue ‘ASK’ button.

Question 3

My question now appears at the top of the stream.

Question 4

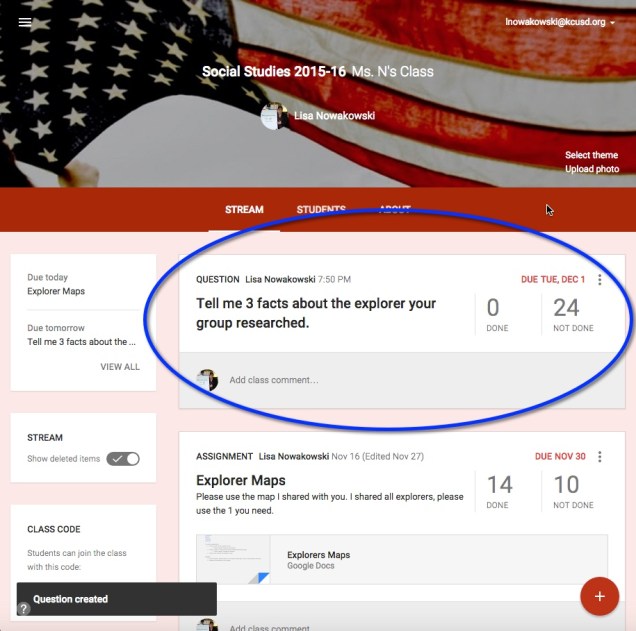
Here’s an example we did early this year. Once the students respond, I can then grade their answers if I choose to. On this particular example, I gave the students some material to review before answering. In order to encourage open dialog, I also asked them to comment on each other’s responses.

Question 5

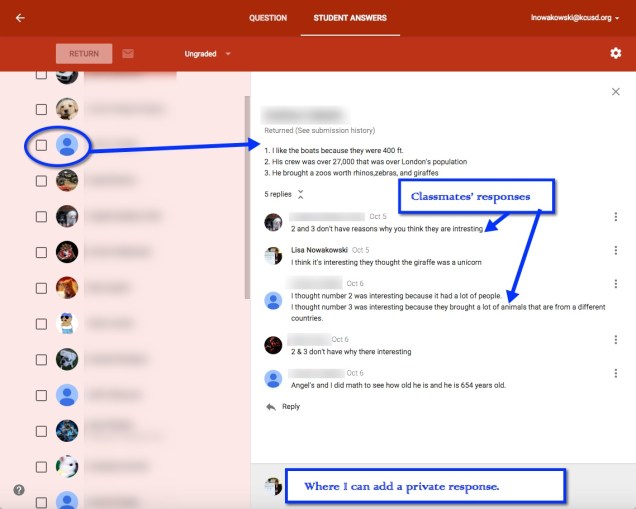
When I’m ready to view, I can click on ‘Done’ in the Question. This takes me to the Student Response page. All of their responses are listed along with the option to grade, comment, and return work.

Question 6

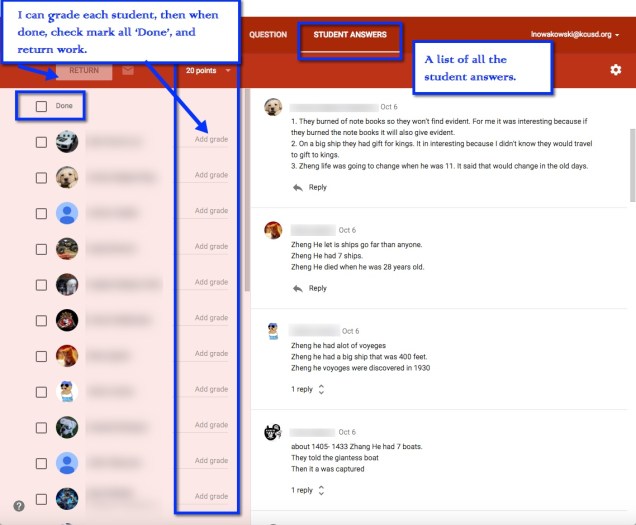
When I click on an individual student, I can see his/her answer and the classmates’ responses.

Question 7


Search Your Google Drive

I have heard several comment that it is hard for them to find items in their Drive. What many are forgetting is that Drive has powerful search options.

In Google Drive there is a ‘Search Drive’ option at the top. You can type in key words such as the title or known keywords in the item you are looking for. I did a search for ‘puppy’. I know I don’t have anything named that, but I wanted to see which items had ‘puppy’ mentioned. This is what I got:

Screen Shot 2015-05-08 at 5.03.11 PM

None of the items are named ‘puppy’. So I wondered what ‘Rabbit’ had to do with puppy. So I went into the Spreadsheet, did a quick search (control + f on PC, or command + f on Mac) and this is what I found. Puppy is mentioned throughout the Spreadsheet.

I can also narrow my search by file type, opens with, or ownership. Choose the small arrow to the right on the Search Drive bar. So if I know the item I am looking for is in a Spreadsheet, I’d choose ‘opens with’ and select spreadsheet.

This should make searching for your items a bit easier. Happy Searching!

Speech Recognition Add-On

Today the Speech teacher asked if there was a way that Google could do an audio recording. I immediately thought of Google Voice. Then she explained that she needs to transcribe what was said. I changed my mind. While Google Voice does transcribe conversations, it requires a Google Voice Number. I’m not sure the teacher is ready for this. I was thinking in terms of what would be easiest for her, now.

Docs Add-Ons ‘Speech Recognition’

I currently have a student using this tool. He finds it difficult to get his thoughts from his head to his fingers. He’s been using this tool with great success. The tool is simple to use. Go to ‘Add-ons’ > ‘Speech Recognition’ > Start. A toolbar will appear on the right side of the screen. Press ‘Start’ and begin speaking. The text will appear in the space. Once you are done speaking, press ‘Stop’ and the text will automatically be inserted in the document.

Just like voice recognition texting, the speaker will have to say, “Period,” in order for periods to be inserted. So in the case of the school’s Speech teacher, she’ll have to go back and insert them herself, but hey that beats transcribing the whole conversation! I also suggested recording it on her phone for reference.

Get The Add-On 

Move PlaceMark Between Layers

I have begun to plan my trip to Italy. As part of this I am creating a Google Map for each city I will visit. Within each city, I have different layers: Transportation, Hotels, Sights. While creating my Rome Map, I accidentally placed a hotel in the Sights Layer. My initial thought was that I would have to delete it and start over again, making sure that I placed it in the correct layer. Then…I thought, “Wait a minute, this is Google. I wonder if I can drag and drop the hotel to the correct layer.” Happily the answer was yes! So easy.

Check it out. The image on the left has Hotel Oceania on the Sights Layer. I drug that up to the Hotels Layer, where it now resides – shown in the image on the right.

Insert Video – Google Slides

Inserting a video into a Google Slide is simple. Open the Slide you’d like to add a video to. Choose ‘Insert’ from the top menu, then ‘Video’.

Slides Video 1 (1)

Once you choose ‘Video’ a pop-out window appears. You then have the option to search for a YouTube video by either URL or Search by keywords. When you find your desired video choose the blue ‘Select’ button on the bottom left.

Slides - video 2 (1)

It will then appear on your slide.

Free To Use Images

A part of being a responsible digital citizen isn’t just about being safe on the web, but also responsibly attributing work, like images. When my students are searching for an image to use to enhance their work, they are required to use ‘Free to use’ images. Those are images that have no copyright or restriction. Many of these images can be found on compfight, flickr, wikicommons, and a host of other sites. However, like many of us, my students do a Google Image search to find what they are looking for.

When you first open Google, simply type the keywords for an image. In this case, I’ll use the example ‘puppies’. Then choose ‘Images’. Image 1

Choosing ‘Images’ gives us nothing but rows of cute puppies. But, not all those images are free. Just like we can’t plagiarize words, we can’t use another person’s images – unless we have permission AND properly attribute the image. To find images that we can use, choose ‘Search tools’ along the top bar. This brings down a second bar where we choose ‘Usage rights’. Choosing this will bring down a list of choices. By default, I have my students choose ‘Labeled for reuse’.

Image 2


Doing this will show you only those images that are available to use. Remember to attribute the picture. Most websites will have this for you to copy and paste. When you find an image you want to use, click on the image, then choose ‘Visit page’.

Image 3


For Wikicommons images:

You are given choices on where it will be used. Each choice is accompanied by ‘Attribution’ for you to copy and paste. If you are using the image on a blog, you will choose the ‘Use this file on the web’ option. Then copy and paste the image and attribution.

image 4

image 5

For Compfight:

Type the keywords for your image. You MUST change the search to ‘Creative Commons’ in order to find free images. Choose the desired image. A pop-out window appears. You will need to copy and paste the image, then copy and paste the html code (for use on the web) in order to attribute the image.

Image 6

image 7

For Flickr:

Type the keyword and press ‘Enter’. Under ‘License’ choose ‘Creative Commons’. Once you find the image you like, choose it. In the bottom right corner, there are a few choices. The middle arrow will give you the option of an embed code or html (for web use). However, if you use Google Chrome I recommend Flickr cc attribution helper for easy attribution.

image 8

image 9


And as models to our students (or staff) we also need to be responsible digital citizens. Happy attribution everyone!

Search By Region

Recently, my students learned about Jamestown and Pocahontas. The adopted textbook told the story through the eyes of the United States. This was interesting, but I wondered how England viewed those events. As a result, we researched what the UK had to say about those subjects.

How’d We Do That?

We refined our search to find only items that were from the UK. We started with our basic search, ‘Pocahontas’. Then went to the ‘Gear’ for an Advanced Search.

AS1

This takes us to a new page filled with search options. For this post, we will focus on searching by Region. Finding the ‘Region’ choice, select the down arrow located on the right side of the gray bar that reads ‘any region’. This then allows the drop down menu to appear. Then select the desired region. We chose ‘United Kingdom’. Finally, select the blue ‘Advanced Search’ button located on the lower right side of the screen.

AS2

Notice the Web Addresses of the refined search. They all are from the United Kingdom. Incidentally, we found a game on the BBC website that had some interesting facts.

AS3

Search By Reading Level

Update: 5-10-15

As of recent, this feature is no longer available.

Too Much Information

There IS such a thing as ‘Too Much Information’! When students begin ‘researching’ on a particular topic, they all too often type in the topic and choose the first link in the list. We need to help guide these students to better resources that they are able to access. One quick way is to teach students how to search by reading level on Google.

Conduct a Search By Reading Level

My students will soon begin learning about the Revolutionary War. When I ‘Googled it’ I was given a long list of websites and images. This is NOT what I want my students doing. They will inevitably go to wikipedia, ‘read’ information, become overwhelmed, and ultimately copy sentences. Thus driving me nuts. As I would like to avoid the whole frustrating process – for both our sakes – I am teaching them some basic search skills.

So here’s what I got when I typed ‘Revolutionary War’. Notice that along with images and videos along the top bar (below the search box) there are ‘Search Tools’. This is what I want!

Search 1

When I choose ‘Search Tools’ a secondary ‘bar’ appears on the next line. Choose ‘Reading Level’.

Search 2

Doing this will result in the ability to choose ‘Basic’, ‘Intermediate’, or ‘Advanced’. For my 5th graders, I encourage them to choose ‘Basic’. Explaining that the items that will be displayed will be closer to their reading level.

Search 3

It’s as easy as that to find information my students can access on the Internet. There is a lot of information out there, we need to arm ourselves and our students with the necessary tools to wade through it.

Submit Group Work

Google Classroom has made my workflow seamless. Recently I had a teacher ask how to have students, who are not document (or slides) owners, ‘submit’ work. I’ll admit, my workflow made my life a little harder. Then, one of my students – Frankie (I told him that he would get a shout out) – simply suggested having the non-owners submit the link for the assignments. So being the collaborative classroom, we gave Frankie a Class Dojo point for helpfulness, and celebrated his brilliance.

How Do Students Submit a Link?

While the students are in their Assignment, they have the option to ‘Add’, ‘Create’, or ‘Mark as Done’.

Assignment


If your students have been working collaboratively on a project, they most likely have created it within their Drive and shared with others. Now, the owner is the only person who has rights to submit the document. They will do this by choosing ‘ADD’ then ‘Google Drive’ and proceed to find the project.

Add


The non-owners, will need to locate the documents link, and be sure that ‘anyone with the link can view’.

Share 1

Share 2


They will then Copy this link in the assignment. However, they will choose ‘Link’ and paste the code there.

Copy Link