Inserting items on the last version of Google Sites (which I loved) was a bit complicated. However, with the New Google Sites, it’s as easy as 1 or 2 clicks! Check it out:
Google Sites
NEW Google Sites Part 1: Getting Started
I was a fan of the old Google Sites, but admittedly it was clunky. Last year when Google announced its launch of the new sites I was stoked! It was the update I had been waiting for for years. The look is sleek and it’s easy to build a beautiful site. Now that it’s out of just the edu market, I’m even more thrilled. This video will kick off my video series on the New Google Sites!
Google Sites: Add/Edit Sidebar Countdown
On my classroom website, I like to have a countdown for events. These might include Days until:
- Conferences
- Minimum days
- Vacations
- Breakout EDU sessions
Other ideas include:
- End of semester
- Days until a project is due
- Meetings
Doing this is easy! Log into your site. Locate the ‘Gear’ and navigate to ‘Edit Site Layout’.

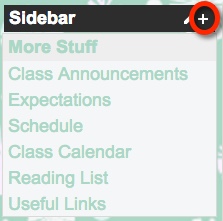
Once this option is selected, the top bar should show that you can now edit the Site layout. Next, locate ‘Sidebar’ and select the ‘+’ to insert a countdown.

This will then bring up a pop-out window. There will be several options to choose from such as Navigation, Text, and Countdown. Once you select Countdown, you will be able to configure your countdown. Name your event and set the date. When finished select ‘Ok’.

Now in the upper right corner, select ‘Close’ before exiting.

Once your Countdown has expired, setting the next one requires you to ‘Edit Site Layout’. Simply navigate towards the ‘Gear’, go down to ‘Edit Site Layout’, locate your expired Countdown, and hover your mouse. Notice the tag ‘Edit sidebar item’.

This will bring up the ‘Configure Countdown’ window. Identify your next Event and Event Date, select ‘ok’, then ‘Close’.
Happy counting!
Google Sites: Delete Logo
Many districts automatically have their logo attached to header on Google Sites. Deleting the Logo is an easy process.
